Basic Operations
Essential operations for controlling and using the RTMC130 Motion Control System.
Basic Operations Guide
This guide covers the fundamental operations you'll need to master to effectively use the RTMC130 Motion Control System. These basic skills form the foundation for creating complex camera movements and animations.
Note: Before attempting these operations, ensure your hardware is properly set up and the RTMC130 software is running as described in the previous sections.
Axis Control Fundamentals
The RTMC130 system controls multiple motors, each assigned to an axis in the software. Understanding how to control these axes is essential for operating the system.
Axis Numbering and Functions
In our standard configuration, the axes are assigned as follows:
| Axis # | Default Function | Typical Use |
|---|---|---|
| 1 | Track | Forward/backward movement |
| 2 | Lift | Vertical movement |
| 4 | East/West | Left/right movement |
| 5 | Pan | Horizontal camera rotation |
| 6 | Tilt | Vertical camera rotation |
| 7 | M_ROT | Camera roll rotation |
| 8 | M_TRM | Additional axis (specialized uses) |
| 9 | Focus | Lens focus control |
| 10 | Zoom | Lens zoom control |
Note: These assignments can be customized in the software using the Motor Patching feature (see Motor Patching section).
Jogging an Axis
"Jogging" refers to manually moving an axis. This is the most fundamental way to control the system.
Using the Jogbox:
- Press the axis number key on the jogbox (e.g.,
1for Track axis) - The axis number will appear on the jogbox LCD display, indicating it's selected
- Use the
+and-keys to move the axis in positive or negative direction - The axis will move at the speed defined in its jog parameters
- Release the
+or-key to stop the movement
Safety Tip: Always be prepared to press the STOP/CANCEL button (large button at the bottom of the jogbox) if any unexpected or dangerous movement occurs.
Adjusting Jog Parameters
You can control how quickly axes respond when jogged:
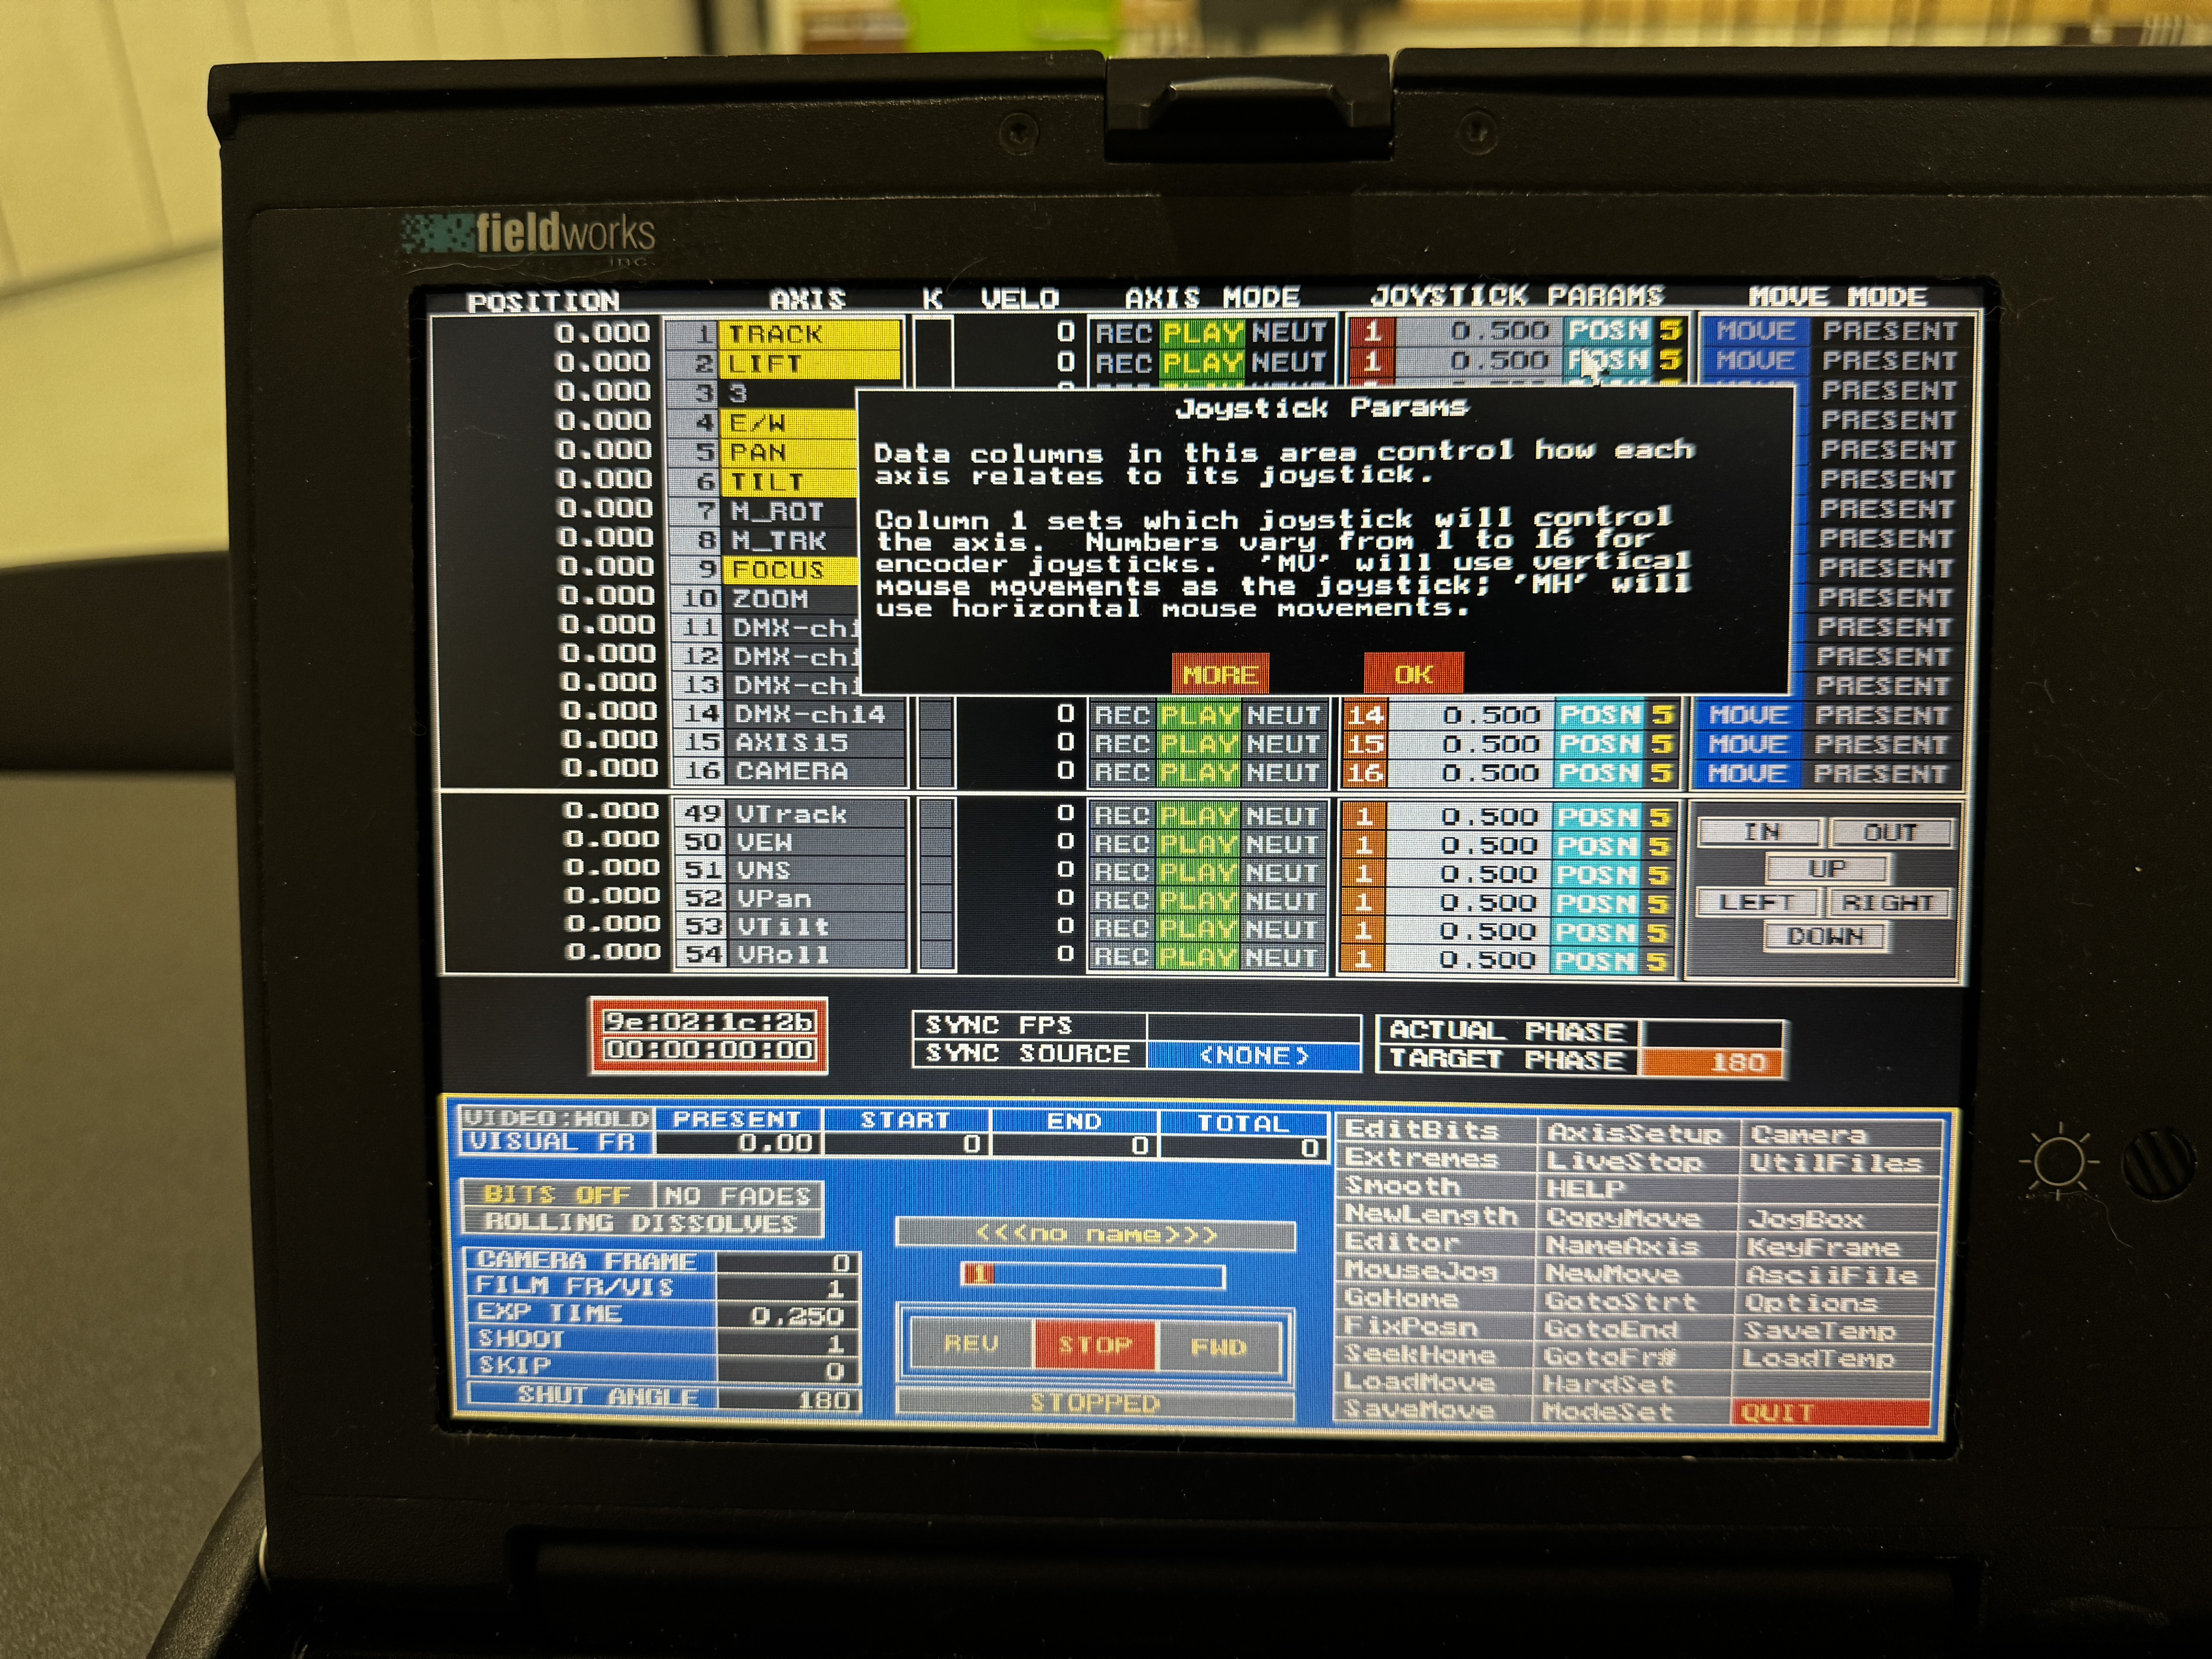
- On the main Control Panel, locate the "JOG PARAMS" column
- Click directly on the jog value for the axis you want to adjust
- Type a new value:
- Higher values = faster movement
- Lower values = slower, more precise movement
- Press
Enterto confirm
Typical jog parameter values:
- 1.00 - 5.00: Slow, precise movements (good for fine adjustments)
- 5.00 - 15.00: Medium speed (good for general positioning)
- 15.00 - 30.00: Fast movement (good for covering large distances)
Jogbox Operations
The jogbox is your primary physical interface to the RTMC130 system. Mastering its operation is essential for efficient use of the system.
Jogbox Layout
The jogbox is organized into several sections:
- LCD Display: Shows current axis selection, position, and status
- Numeric Keypad: For selecting axes (1-9, 0) and jogging (+/-)
- Function Buttons: For various operations (MEMO KEY, RUN, etc.)
- Joystick Knob: For proportional manual control (if configured)
- STOP/CANCEL: Emergency stop button
The jogbox provides many functions through various button combinations. This section covers the most common operations.
Basic Jogbox Functions
| Function | Button Sequence | Description |
|---|---|---|
| Select Axis | Press axis number (1-8) | Selects an axis for jogging or other operations |
| Jog Selected Axis | + or - |
Moves axis in positive or negative direction |
| Set Keyframe | MEMO KEY |
Records current position as a keyframe at the current frame |
| Run Forward | RUN |
Plays the programmed move forward from current frame |
| Run Backward | RUN REV |
Plays the programmed move backward from current frame |
| Emergency Stop | STOP/CANCEL |
Immediately halts all motor movement |
| Toggle Axis Mode | AXIS ON + axis number |
Cycles through REC, NEUT, OFF modes for the axis |
| Goto Frame 0 | GOTO FR0 |
Moves to the beginning of the timeline |
| Increment Frame | INCR FRAME |
Advances to the next frame according to increment setting |
Advanced Jogbox Functions
| Function | Button Sequence | Description |
|---|---|---|
| Assign Joystick | JOYST AX + axis number |
Assigns the physical jogbox knob to control the selected axis |
| Toggle Position/Velocity | POSN/VELO |
Switches joystick between controlling position directly or velocity |
| Set Home Position | SET HOME + axis number |
Sets current physical position as the "home" (zero) position |
| Auto-Calibrate | SET HOME + 15- + value + ENTER |
Automatically calculates pulses per unit based on physical measurement |
| Toggle Virtual Axes | JOG32 + STOP/CANCEL |
Activates or deactivates Virtual Axes mode |
| Enter Browser Mode | JOG32 + LIST KEYS |
Allows scrubbing through timeline using joystick knob |
| Goto Exact Position | JOG32 + SET HOME |
Prompts for exact position value to send axis to |
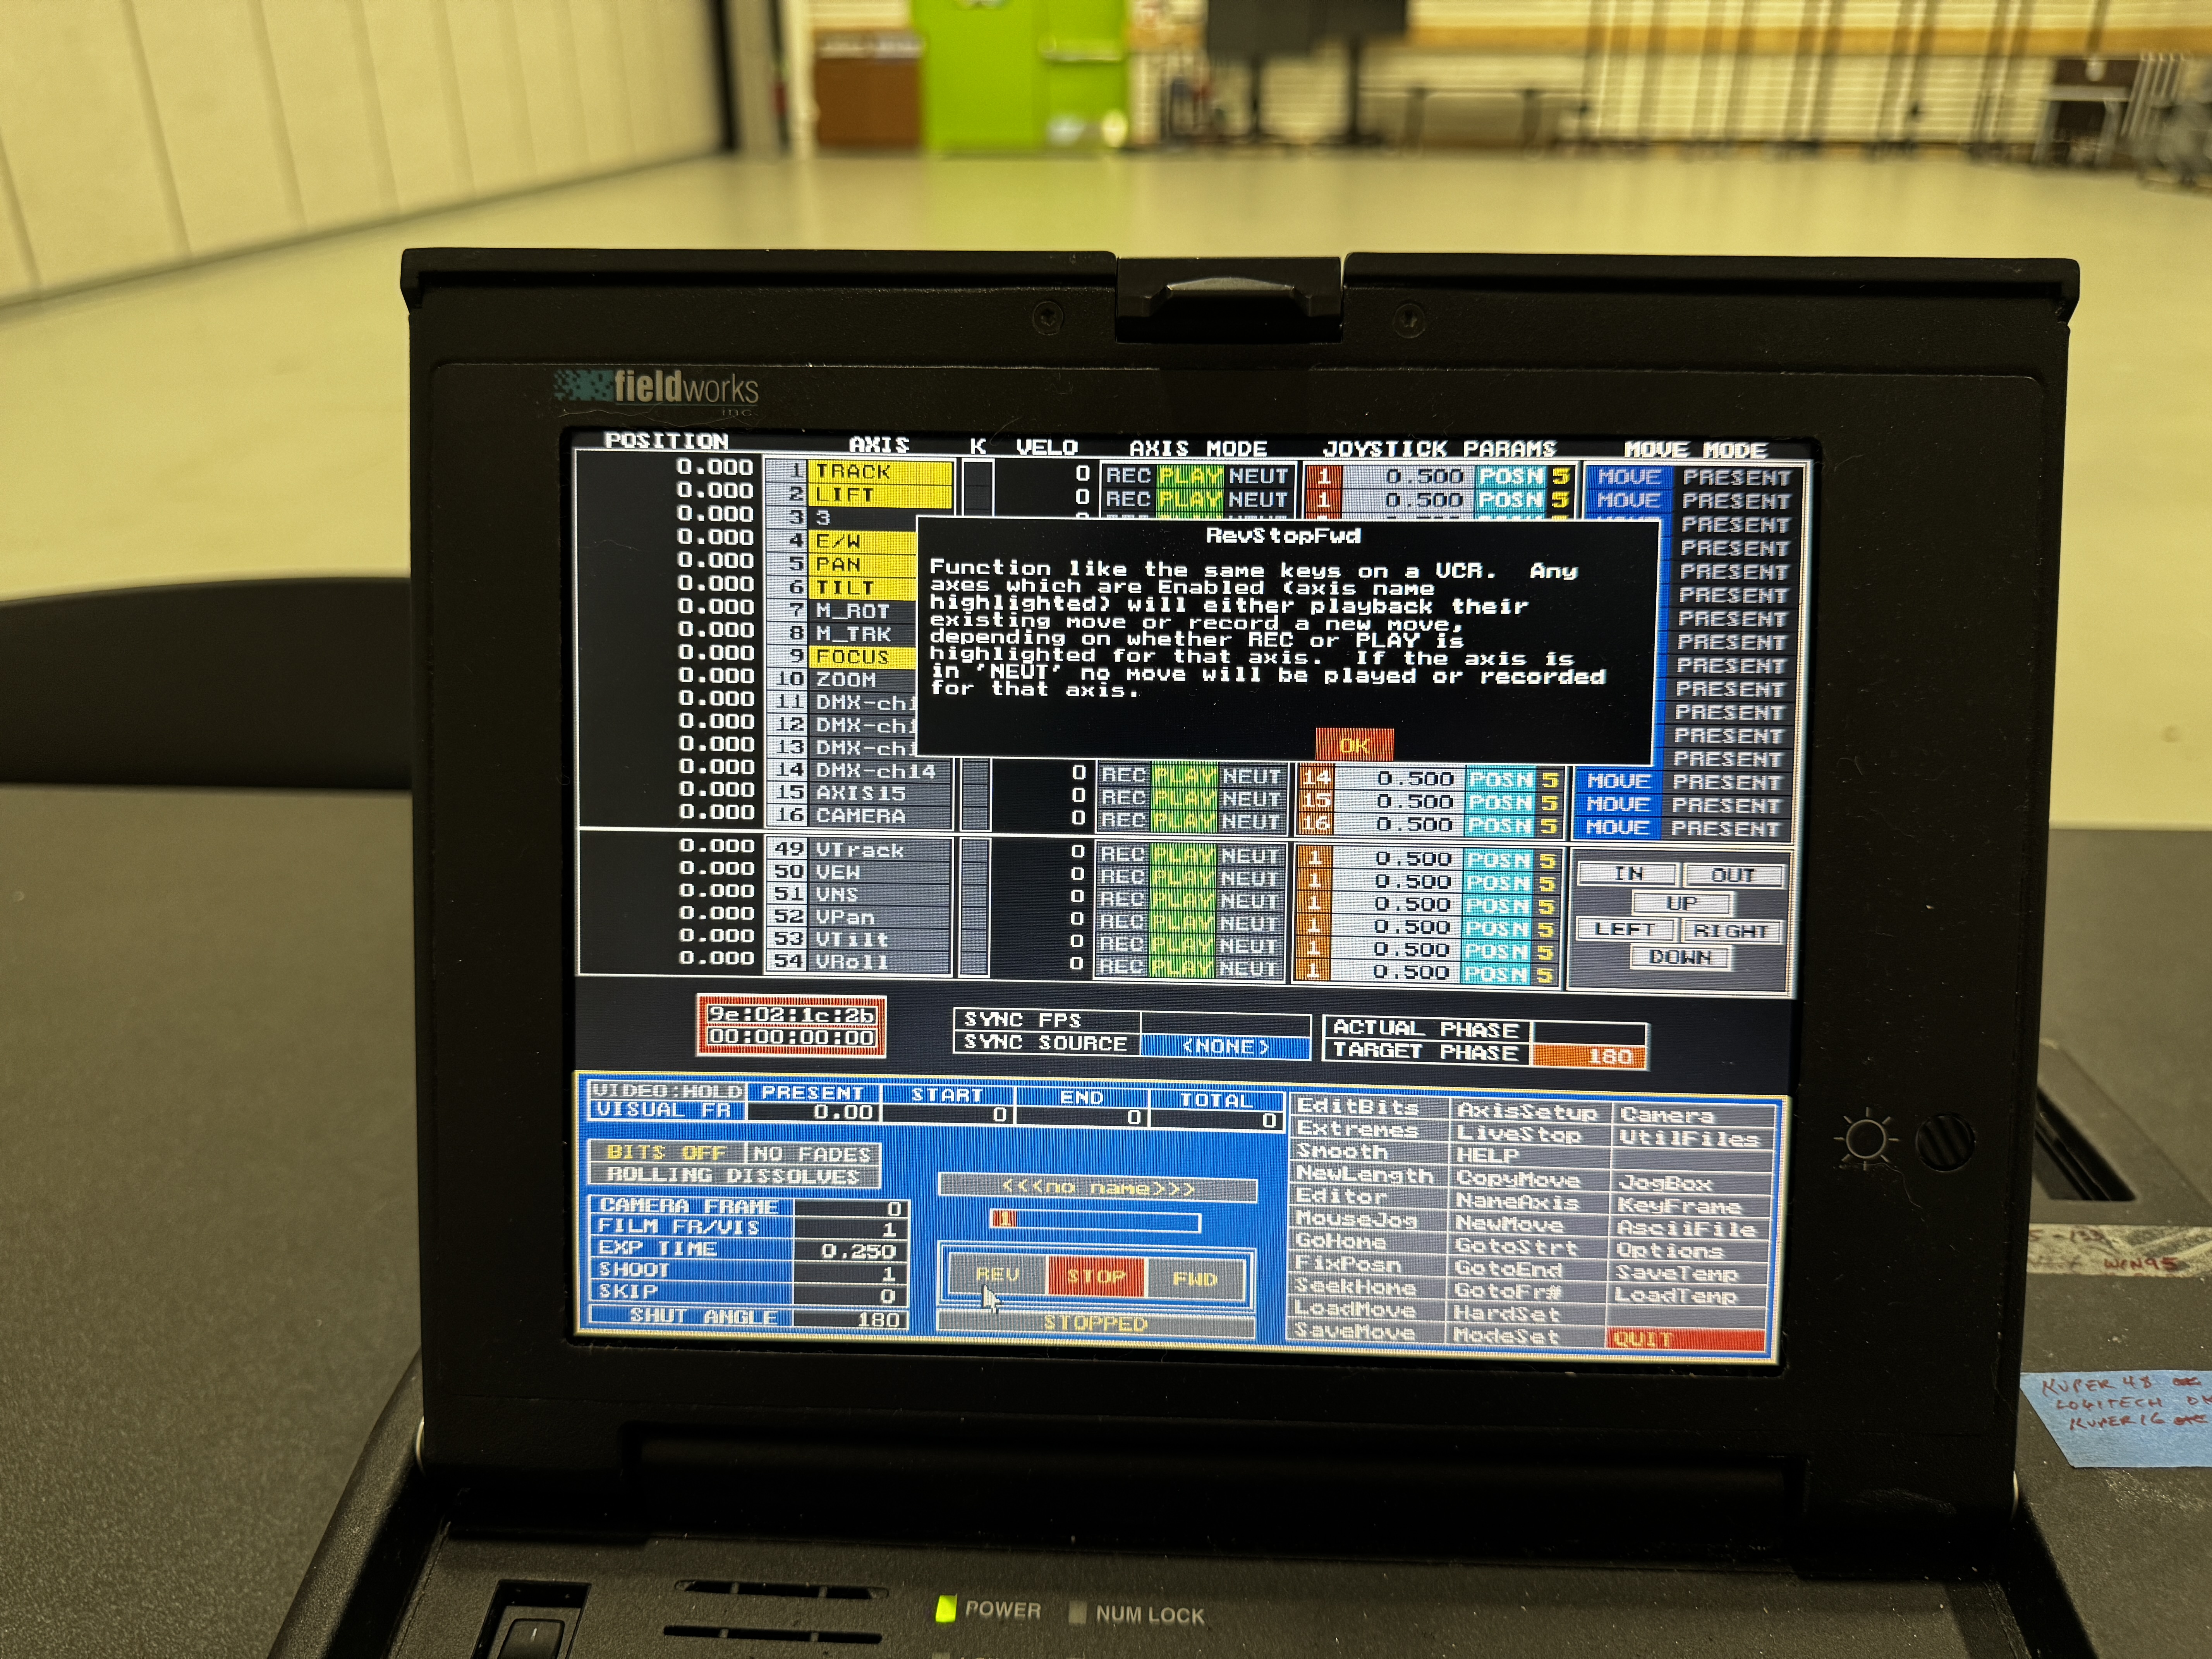
Understanding Axis Modes
Each axis can be set to one of three operational modes that determine how it behaves during recording and playback.
The Three Axis Modes
| Mode | Display | During Recording | During Playback | When to Use |
|---|---|---|---|---|
| Record | REC | Movements are recorded to the move buffer | Follows the recorded path | When you want to program this axis as part of your move |
| Neutral | NEUT | Movements are ignored, not recorded | Follows the recorded path (if any) | When you want to temporarily exclude an axis from recording |
| Off | OFF | Completely disabled | Does not move | When you want to completely disable an axis |
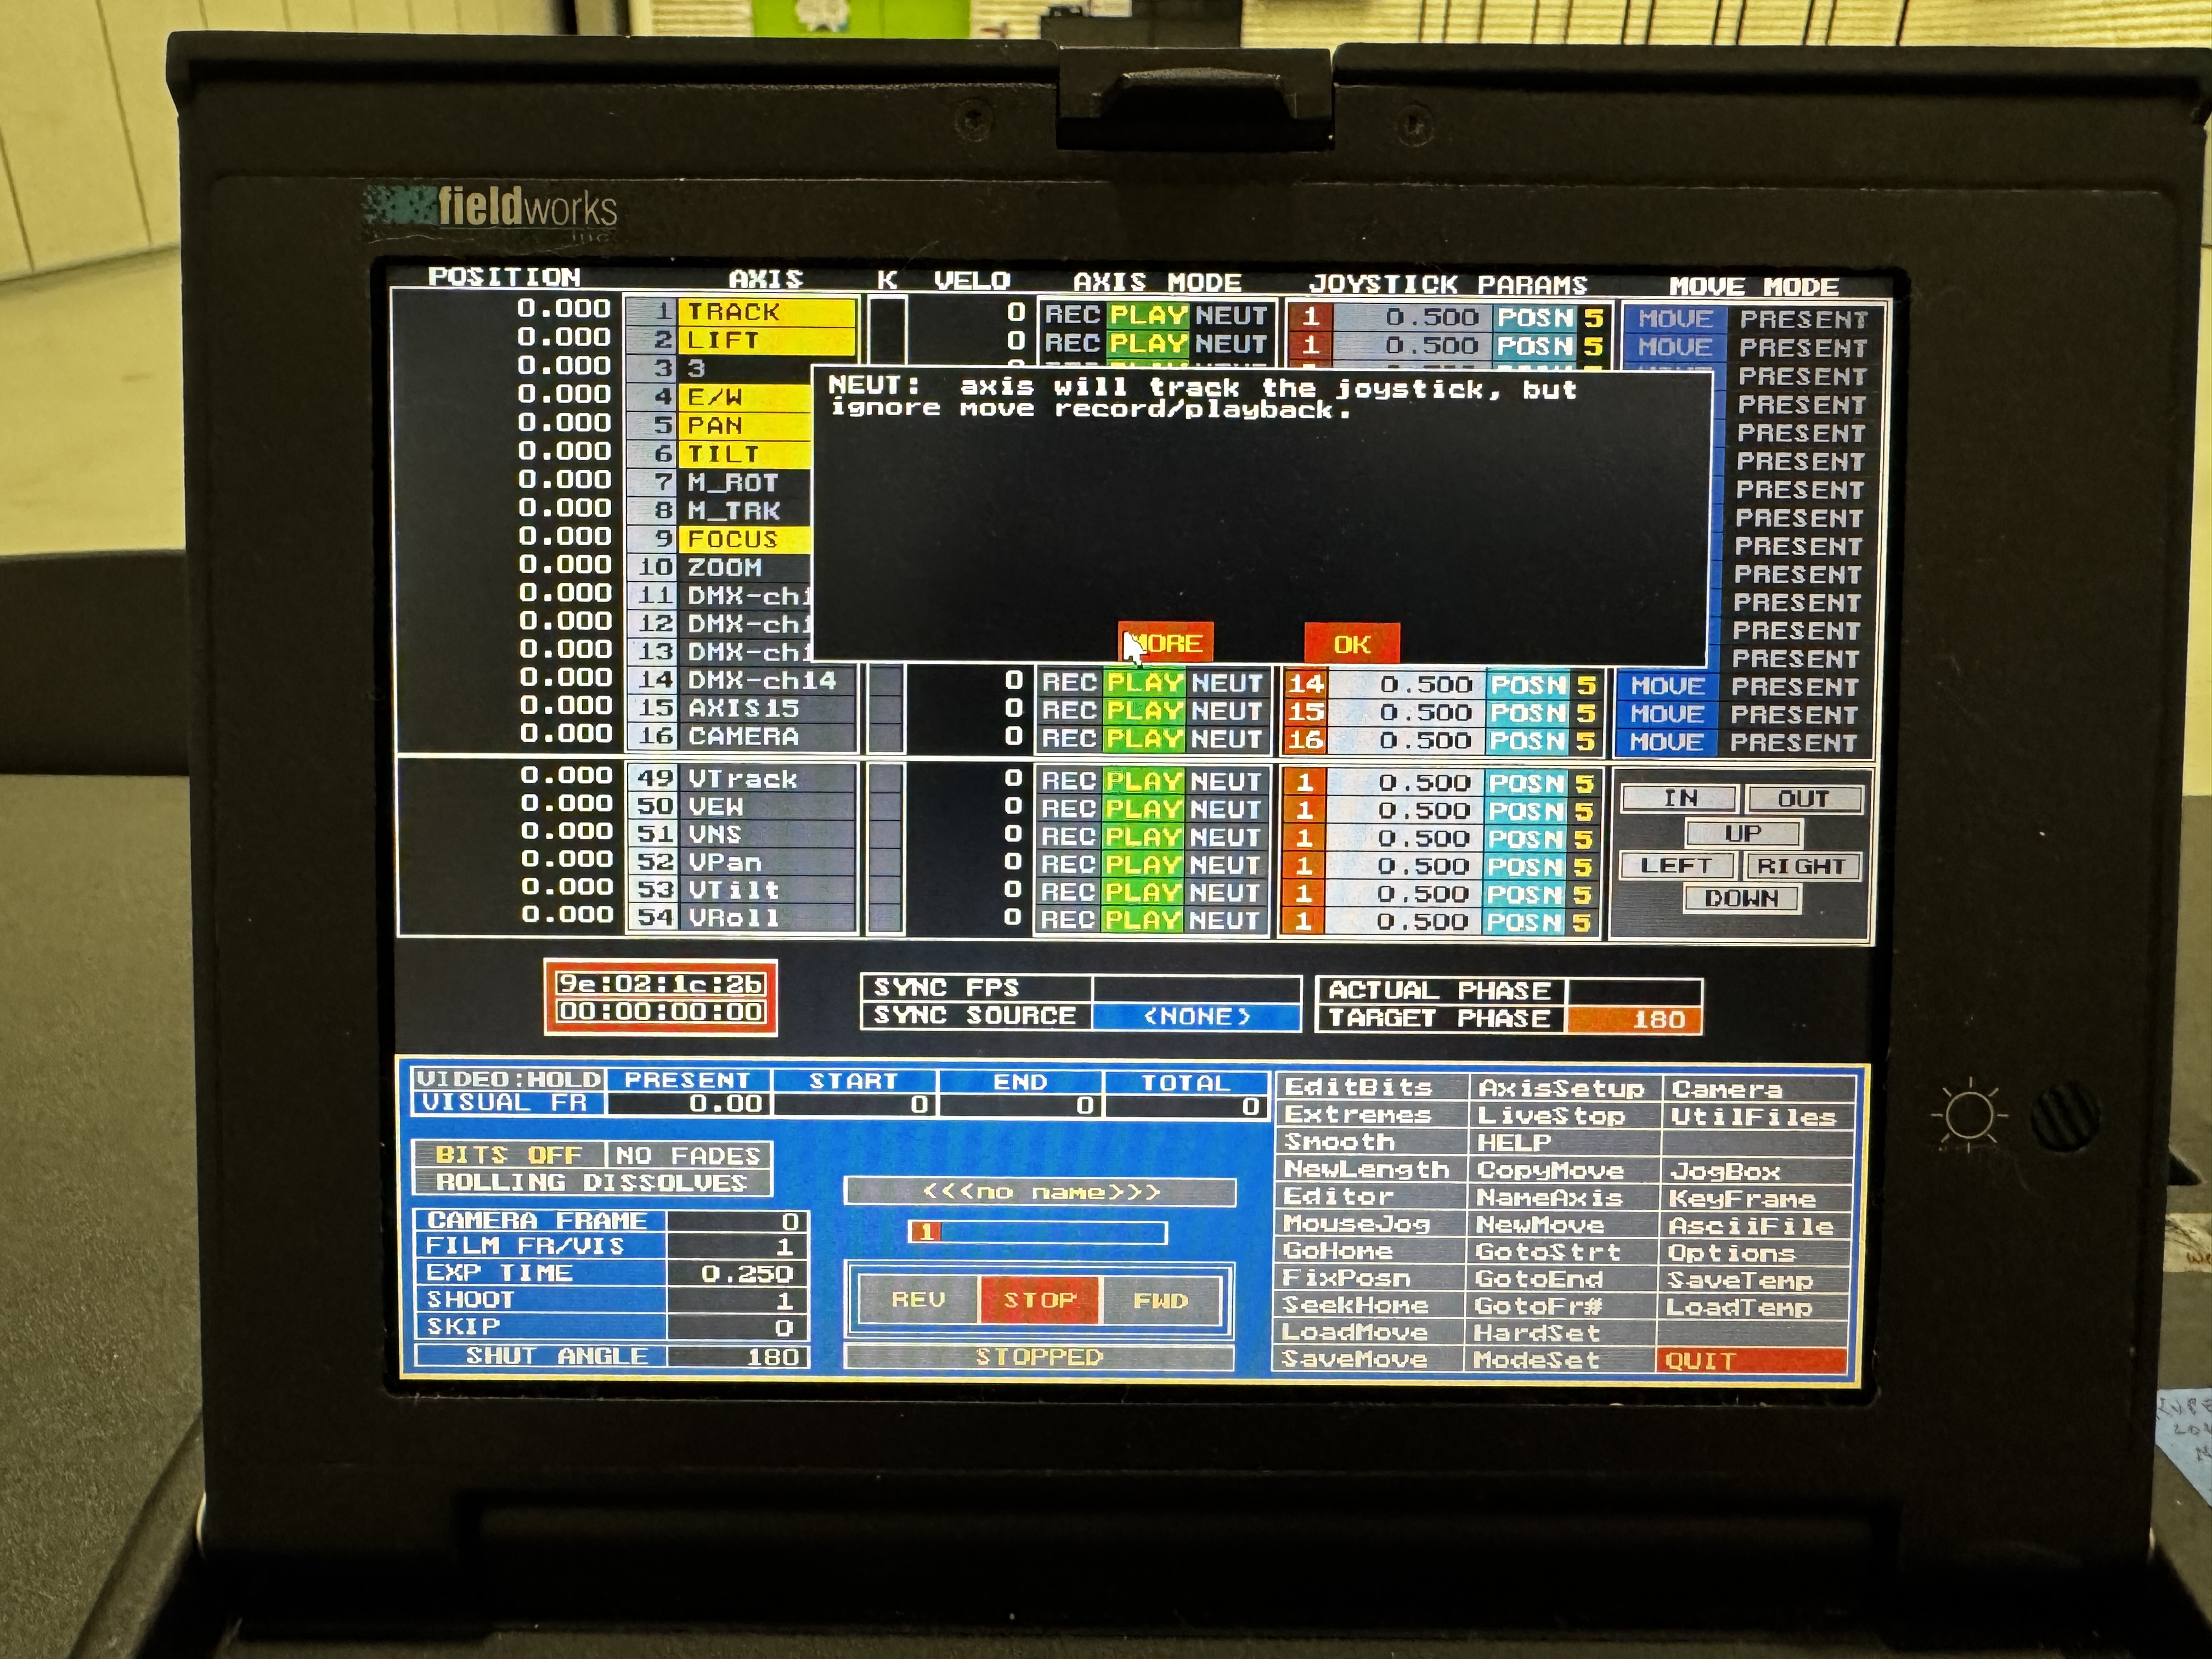
Changing Axis Modes
There are two ways to change an axis mode:
Using the Control Panel:
- On the main Control Panel, find the axis you want to change
- Click directly on the mode indicator in the MODE column
- The mode will cycle through REC → NEUT → OFF → REC
Using the Jogbox:
- Press
AXIS ONon the jogbox - Press the axis number (e.g.,
1for Track) - The mode will cycle through REC → NEUT → OFF → REC
- The current mode will be displayed on the jogbox LCD
Tip: Before recording a move, verify that all axes you intend to include are in REC mode, and all axes you want to exclude are in NEUT or OFF mode. This prevents accidental recording of unwanted movements.
Practical Mode Usage
Consider these common scenarios:
- Setting Up: When initially positioning your camera, you may want to set all axes to NEUT to prevent accidental recording
- Selective Recording: When recording a pan/tilt move, but not base movement, set Pan/Tilt to REC and Track/Lift/E-W to NEUT
- Safety: Set unused axes to OFF to prevent any movement during recording or playback
- Multi-Pass Recording: Record one set of axes (e.g., Pan/Tilt), then switch modes and record another set (e.g., Track/Lift) while playing back the first set
Setting Home Positions
The "Home Position" is the reference point (zero position) for an axis. Properly setting home positions is crucial for accurate and repeatable movements.
Why Home Positions Matter
- Provides a consistent reference point for all movements
- Ensures repeatability between sessions
- Facilitates proper alignment with physical objects or set elements
- Enables more intuitive position readouts (e.g., setting zero at center of rotation)
Setting a Home Position
There are two primary methods for setting home positions:
Using the Jogbox:
- Jog the axis to the desired "zero" position
- Press
SET HOMEon the jogbox - Press the axis number (e.g.,
1for Track) - The position display for that axis will reset to 0.000
Using AxisSetup:
- Click
AxisSetupon the main screen - Select the desired axis
- Find the "Home Position" parameter
- Enter the value for "Home Position" (typically 0.000)
- Click
OKor pressEnterto confirm - Exit AxisSetup
Important: Setting a home position does not physically move the axis. It only changes the position readout reference point. The actual physical position remains unchanged.
Recommended Home Position Practices
For the best results, follow these guidelines when setting home positions:
- Pan/Tilt/Roll: Set home at the center of rotation or a key reference orientation
- Track/E-W/Lift: Set home at a logical starting point (e.g., centered on set, or at the beginning of a dolly track)
- Focus/Zoom: Set home at a commonly used setting (e.g., infinity focus, widest zoom)
- Physical Marking: Mark physical corresponding positions on your equipment to ensure consistency between sessions
- Documentation: Record home position settings in a log for consistent setup between shooting days
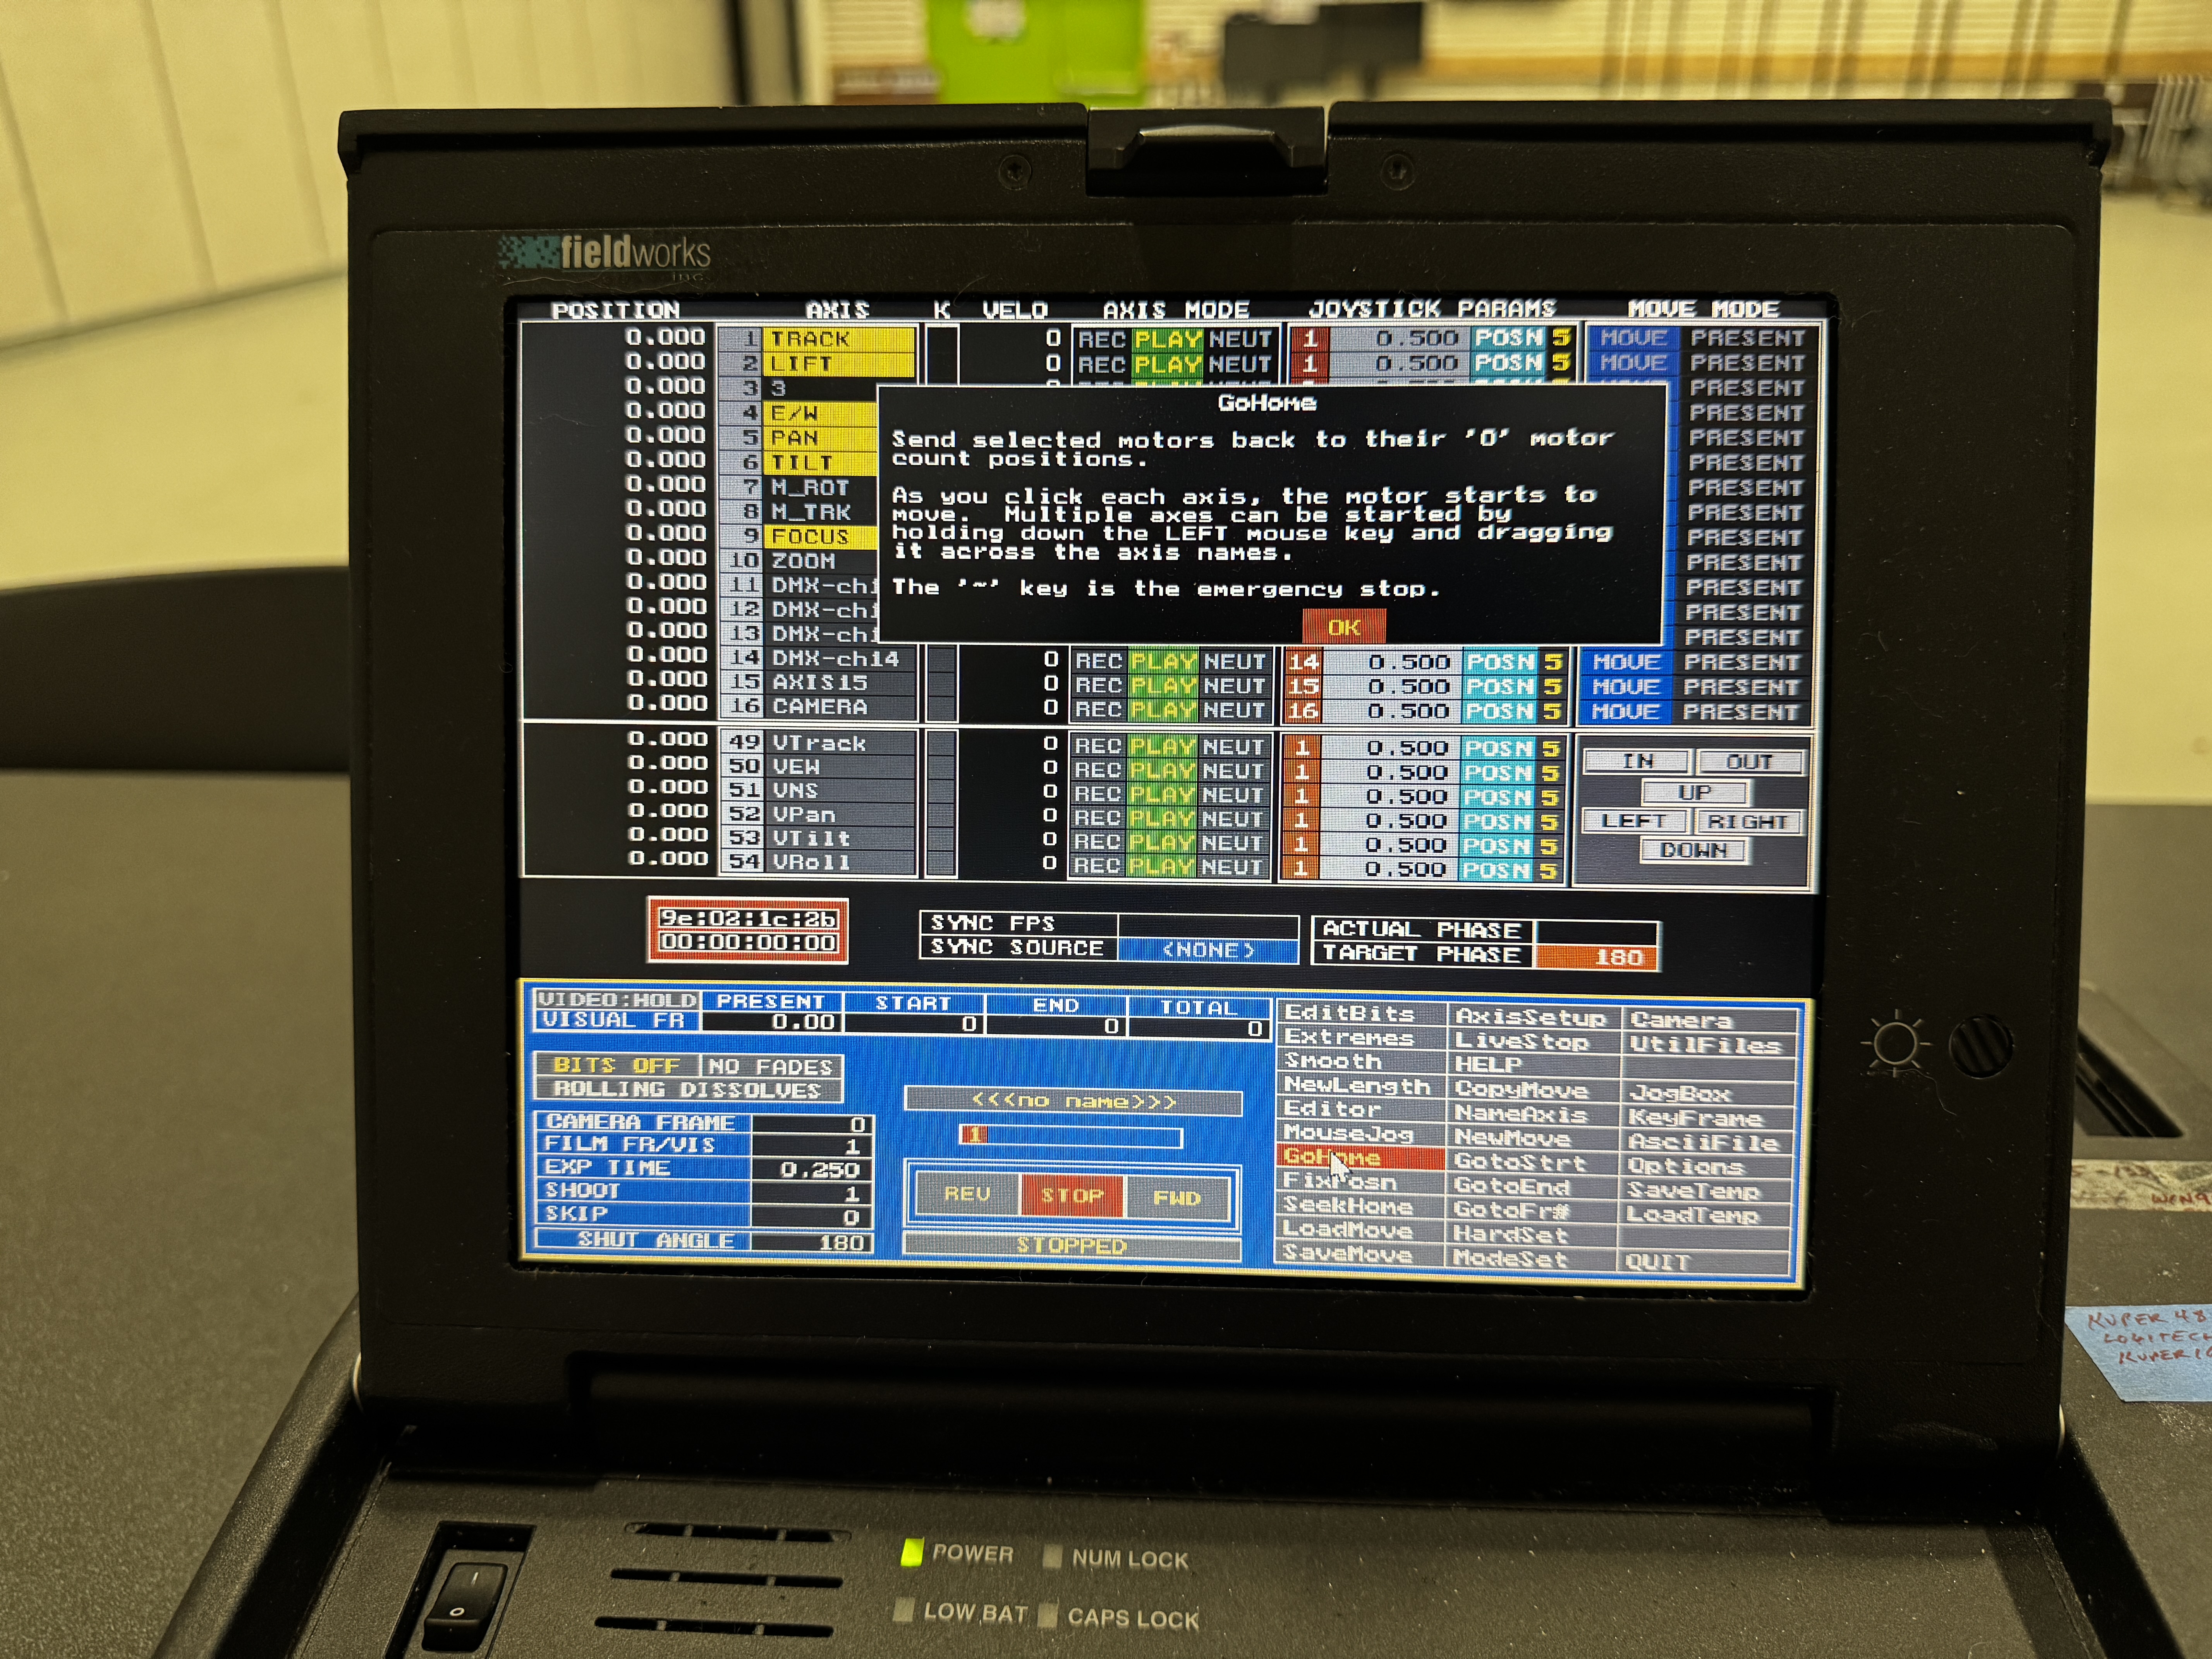
Going to Home Position
To move an axis back to its home position:
- On the jogbox, press
JOG32+GOTO FR0 - Press the axis number (e.g.,
1for Track) - The axis will move to its designated home (zero) position
Tip: When setting up a shot, it's often helpful to return all axes to their home positions before beginning programming. This provides a consistent starting point.
Using MouseJog
MouseJog provides an alternative way to control axes using your computer mouse instead of the jogbox. This can be convenient for certain operations or if the jogbox is not available.
Activating MouseJog
- On the main Control Panel, type
mjand pressEnter - Alternatively, click on the
MouseJogmenu option if visible - The MouseJog interface will appear
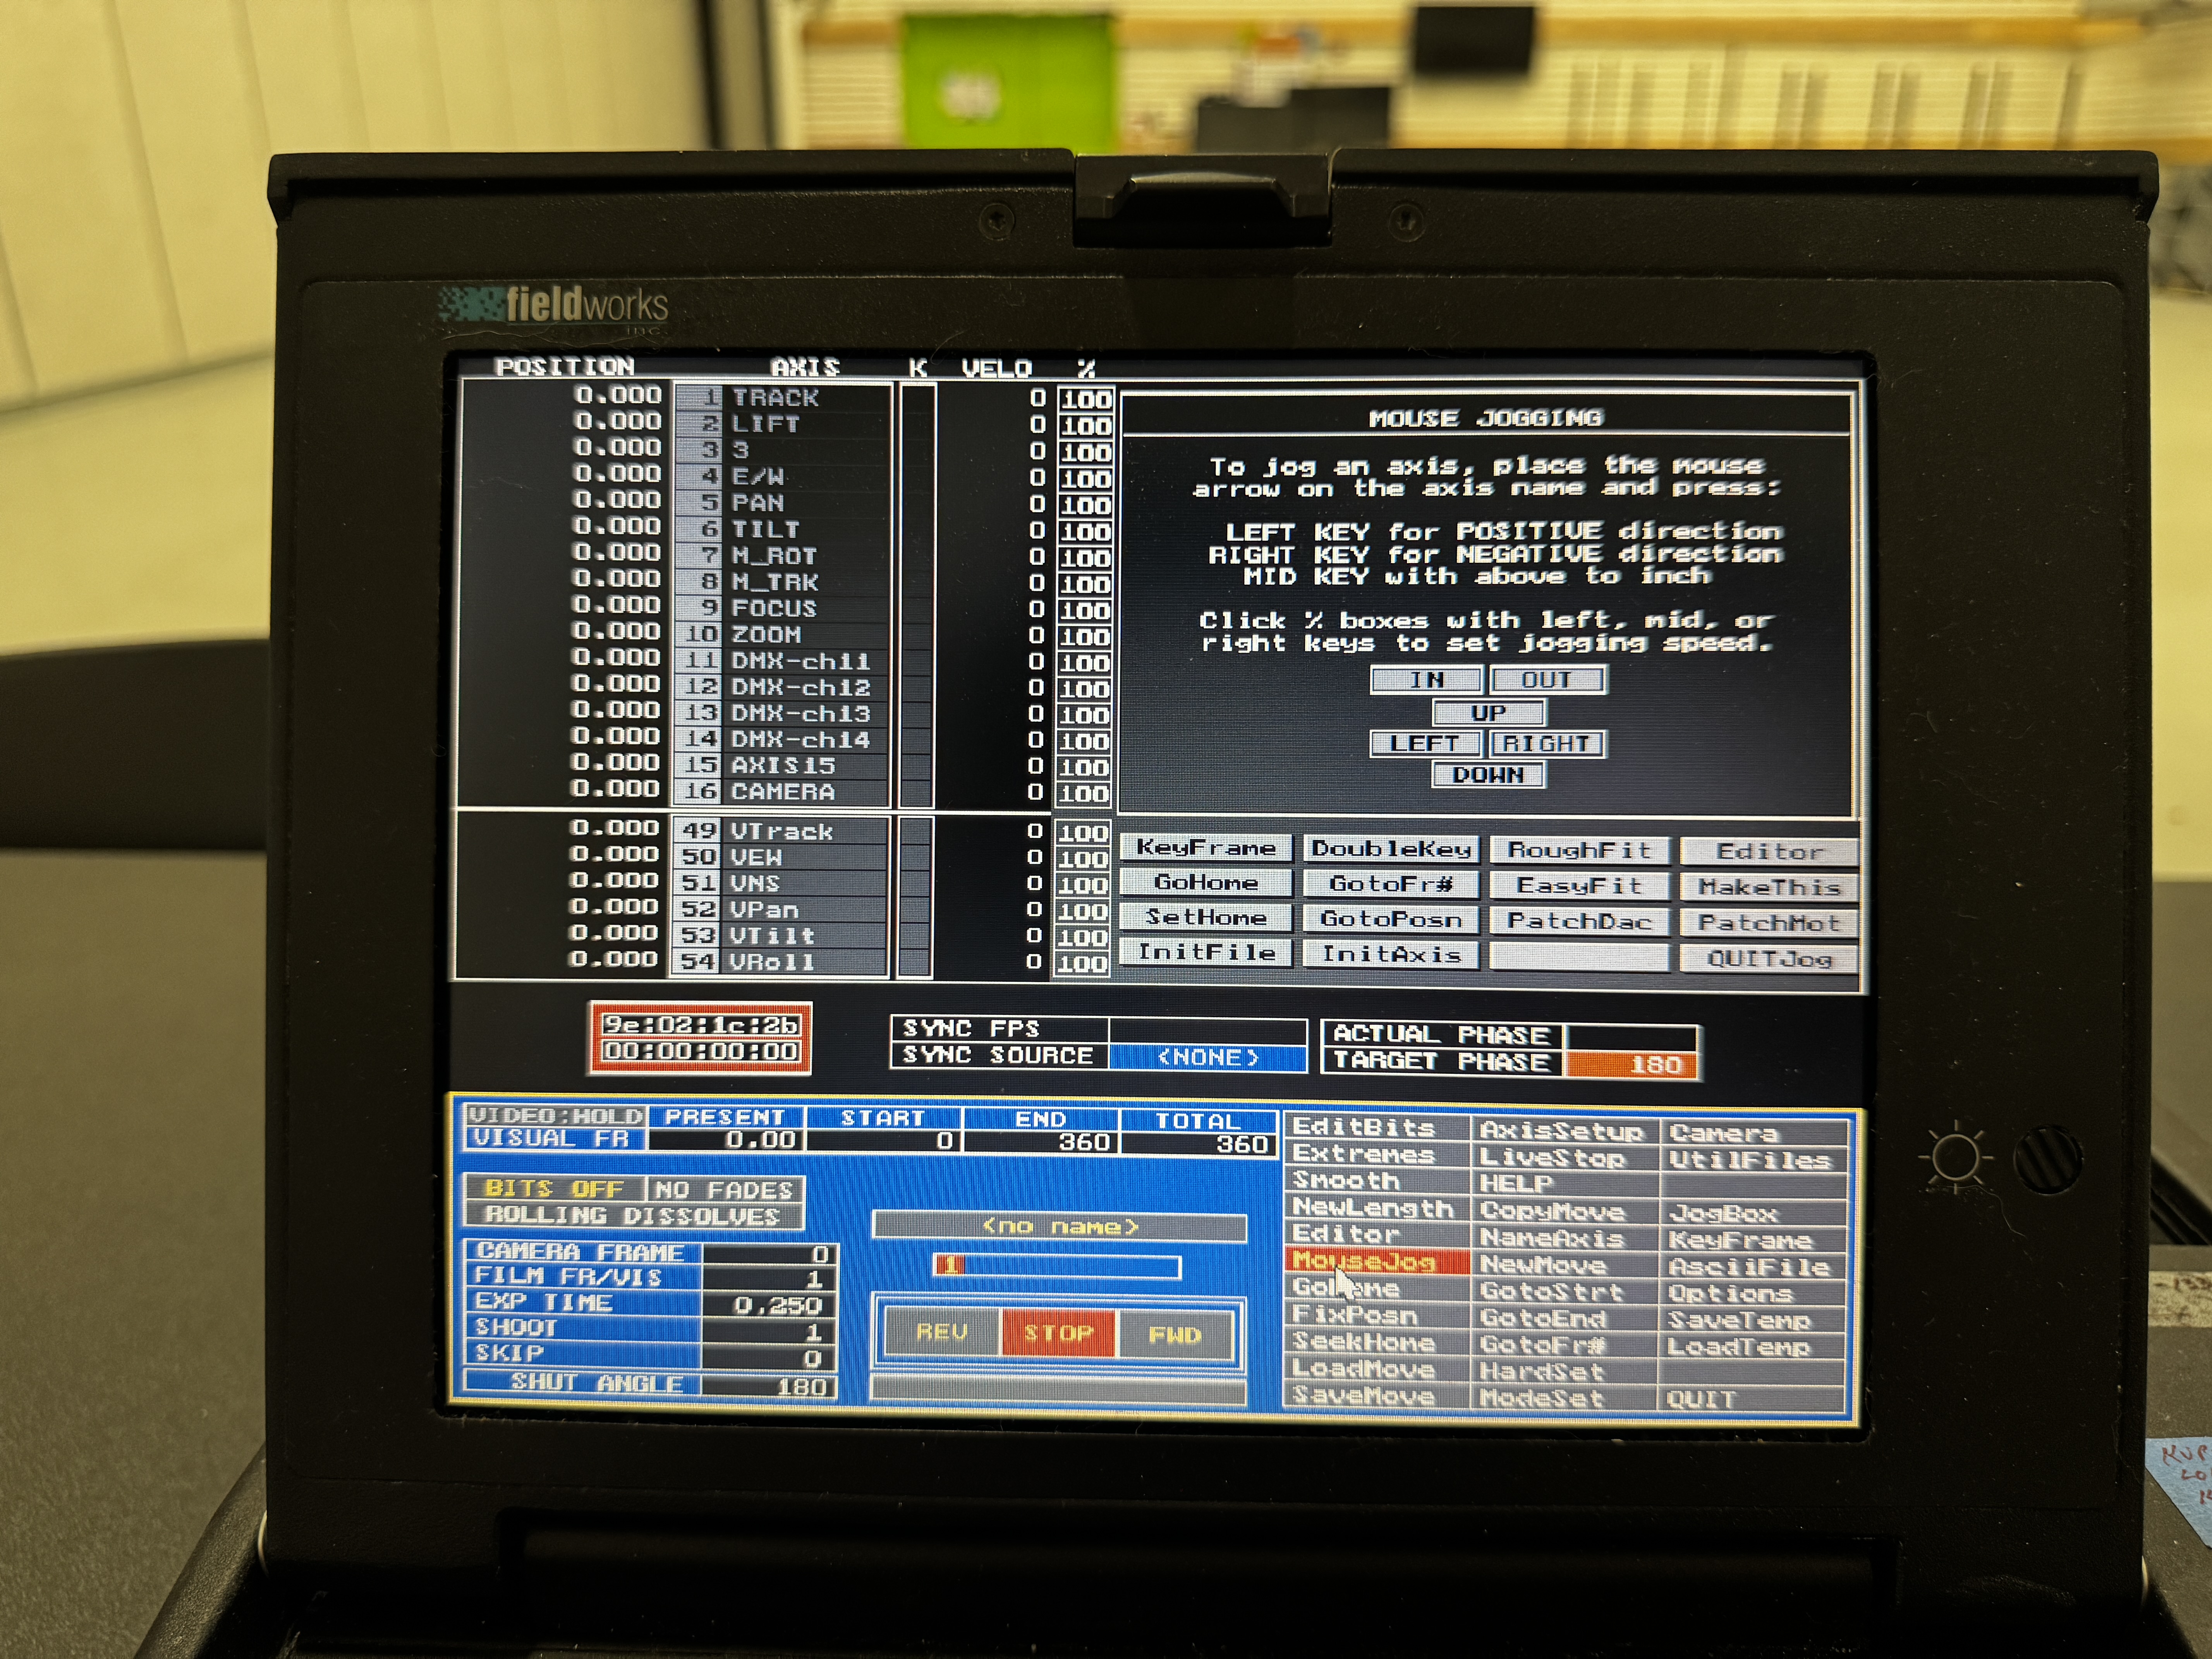
MouseJog Controls
Once MouseJog is active:
- Selecting an Axis: Move your cursor over the axis row you want to control
- Jogging:
- Left-click and hold to jog in the positive direction
- Right-click and hold to jog in the negative direction
- Release the mouse button to stop
- Speed Control:
- Move the cursor closer to the axis name for slower movement
- Move the cursor further to the right for faster movement
- Exiting MouseJog: Press
ESCor click theExitbutton
Tip: MouseJog can be particularly useful when making fine adjustments, as you can control the speed gradually by cursor position.
MouseJog Advantages
- Provides visual feedback directly on screen
- Allows variable speed control based on cursor position
- Convenient for quick adjustments without picking up the jogbox
- Enables control of multiple axes without pressing axis number buttons
MouseJog Limitations
- Less tactile feedback than physical jogbox controls
- May be less precise for certain operations
- Not ideal for rapid, sequential operations on multiple axes
- Requires mouse focus in the application window
Running a Move
Once you've positioned your axes and are familiar with the basic controls, you can run a pre-recorded move or test a simple movement sequence.
Types of Moves
- Keyframed Moves: Series of defined positions that the system interpolates between
- Joystick-Recorded Moves: Continuous movements recorded in real-time using joystick or encoders
- Generated Moves: Mathematically created movements using two-letter commands
Playback Controls
There are several ways to play back a move:
Using the Jogbox:
- First, position at the starting frame (often Frame 0)
- Press
GOTO FR0to go to Frame 0 - Or enter a specific frame: Type the frame number +
G+ENTER
- Press
- Press
RUNto play the move forward from the current frame - Press
RUN REVto play the move backward from the current frame - Press
STOP/CANCELat any time to halt motion
Using the Screen Controls:
- Click the
Goto Frame #button and enter a starting frame - Click
RunorRun Revto play the move - Click
Stopto halt motion
Adjusting Run Speed
You can adjust the speed at which a move is executed:
- On the Control Panel, look for "Speed %" near the bottom of the screen
- Click on the value to change it:
- 100% - Normal speed (real-time)
- 50% - Half speed (slow motion)
- 200% - Double speed (fast motion)
- Press
Enterto confirm the new speed
Important: Setting speeds over 100% can cause unexpected behavior if the motors cannot physically achieve the requested velocity. Always test at lower speeds first, then gradually increase to the desired speed.