Creating Movements
Learn how to program precise camera and robot movements using the RTMC130 Motion Control System.
Creating Movement Sequences
This guide explains how to create precise and complex movement sequences using the RTMC130 Motion Control System. Programming movements is the core function of the system, allowing you to create everything from simple linear moves to sophisticated camera choreography.
Prerequisites: Before creating movements, ensure you have:
- Set up your hardware properly (see Hardware Setup)
- Launched the RTMC130 software (see Software Startup)
- Configured your motors and axes (see Basic Operations and Motor Patching)
Understanding Movement Types
The RTMC130 system supports several methods for creating movements, each with its own strengths and applications:
| Method | Description | Best For |
|---|---|---|
| Keyframing | Creating specific positions at specific frames that the system interpolates between | Precise, planned movements; stop-motion animation; repeatable moves |
| Joystick Recording | Real-time recording of movements using jogbox or external controllers | Natural, organic movements; following action; improvised camera work |
| Two-Letter Commands | Specialized move generation using mathematical functions | Complex paths; technical movements; parameter-based animation |
| Mixed Techniques | Combining different methods for hybrid approaches | Complex shots requiring both precision and organic feel |
Timeline & Frame Rates
All movements in RTMC130 are organized along a timeline measured in frames. Understanding this concept is essential:
- Frame Rate: Typically set to match your project (24fps for film, 30fps for video, etc.)
- Timeline: Starts at Frame 0 and extends to the end of your movement
- Duration: Total length of the move in frames (e.g., 240 frames = 10 seconds at 24fps)
- Current Frame: Your current position on the timeline, shown in the main display
Setting Frame Rate: To change the frame rate, type fr at the main Control Panel, then enter the desired frame rate (e.g., 24.000) and press Enter.
Creating Movements with Keyframes
Keyframing is the most precise way to create movements. It involves setting specific positions at specific frames and letting the system calculate the intermediate positions.
Basic Keyframing Procedure
- Prepare the Axes:
- Ensure all axes you want to include are in
RECmode - Set any axes you want to exclude to
NEUTorOFF
- Ensure all axes you want to include are in
- Set Starting Keyframe:
- Go to Frame 0 by pressing
GOTO FR0on the jogbox - Jog each axis to its desired starting position
- Press
MEMO KEYon the jogbox to set a keyframe at Frame 0
- Go to Frame 0 by pressing
- Create Additional Keyframes:
- Move to a later frame by pressing
INCR FRAMEor entering a specific frame number - Jog axes to their new positions for this frame
- Press
MEMO KEYto set another keyframe - Repeat this process, adding keyframes at strategic points in your timeline
- Move to a later frame by pressing
- Test the Movement:
- Return to Frame 0
- Press
RUNto play the move and observe the results - Make adjustments as needed by modifying existing keyframes or adding new ones
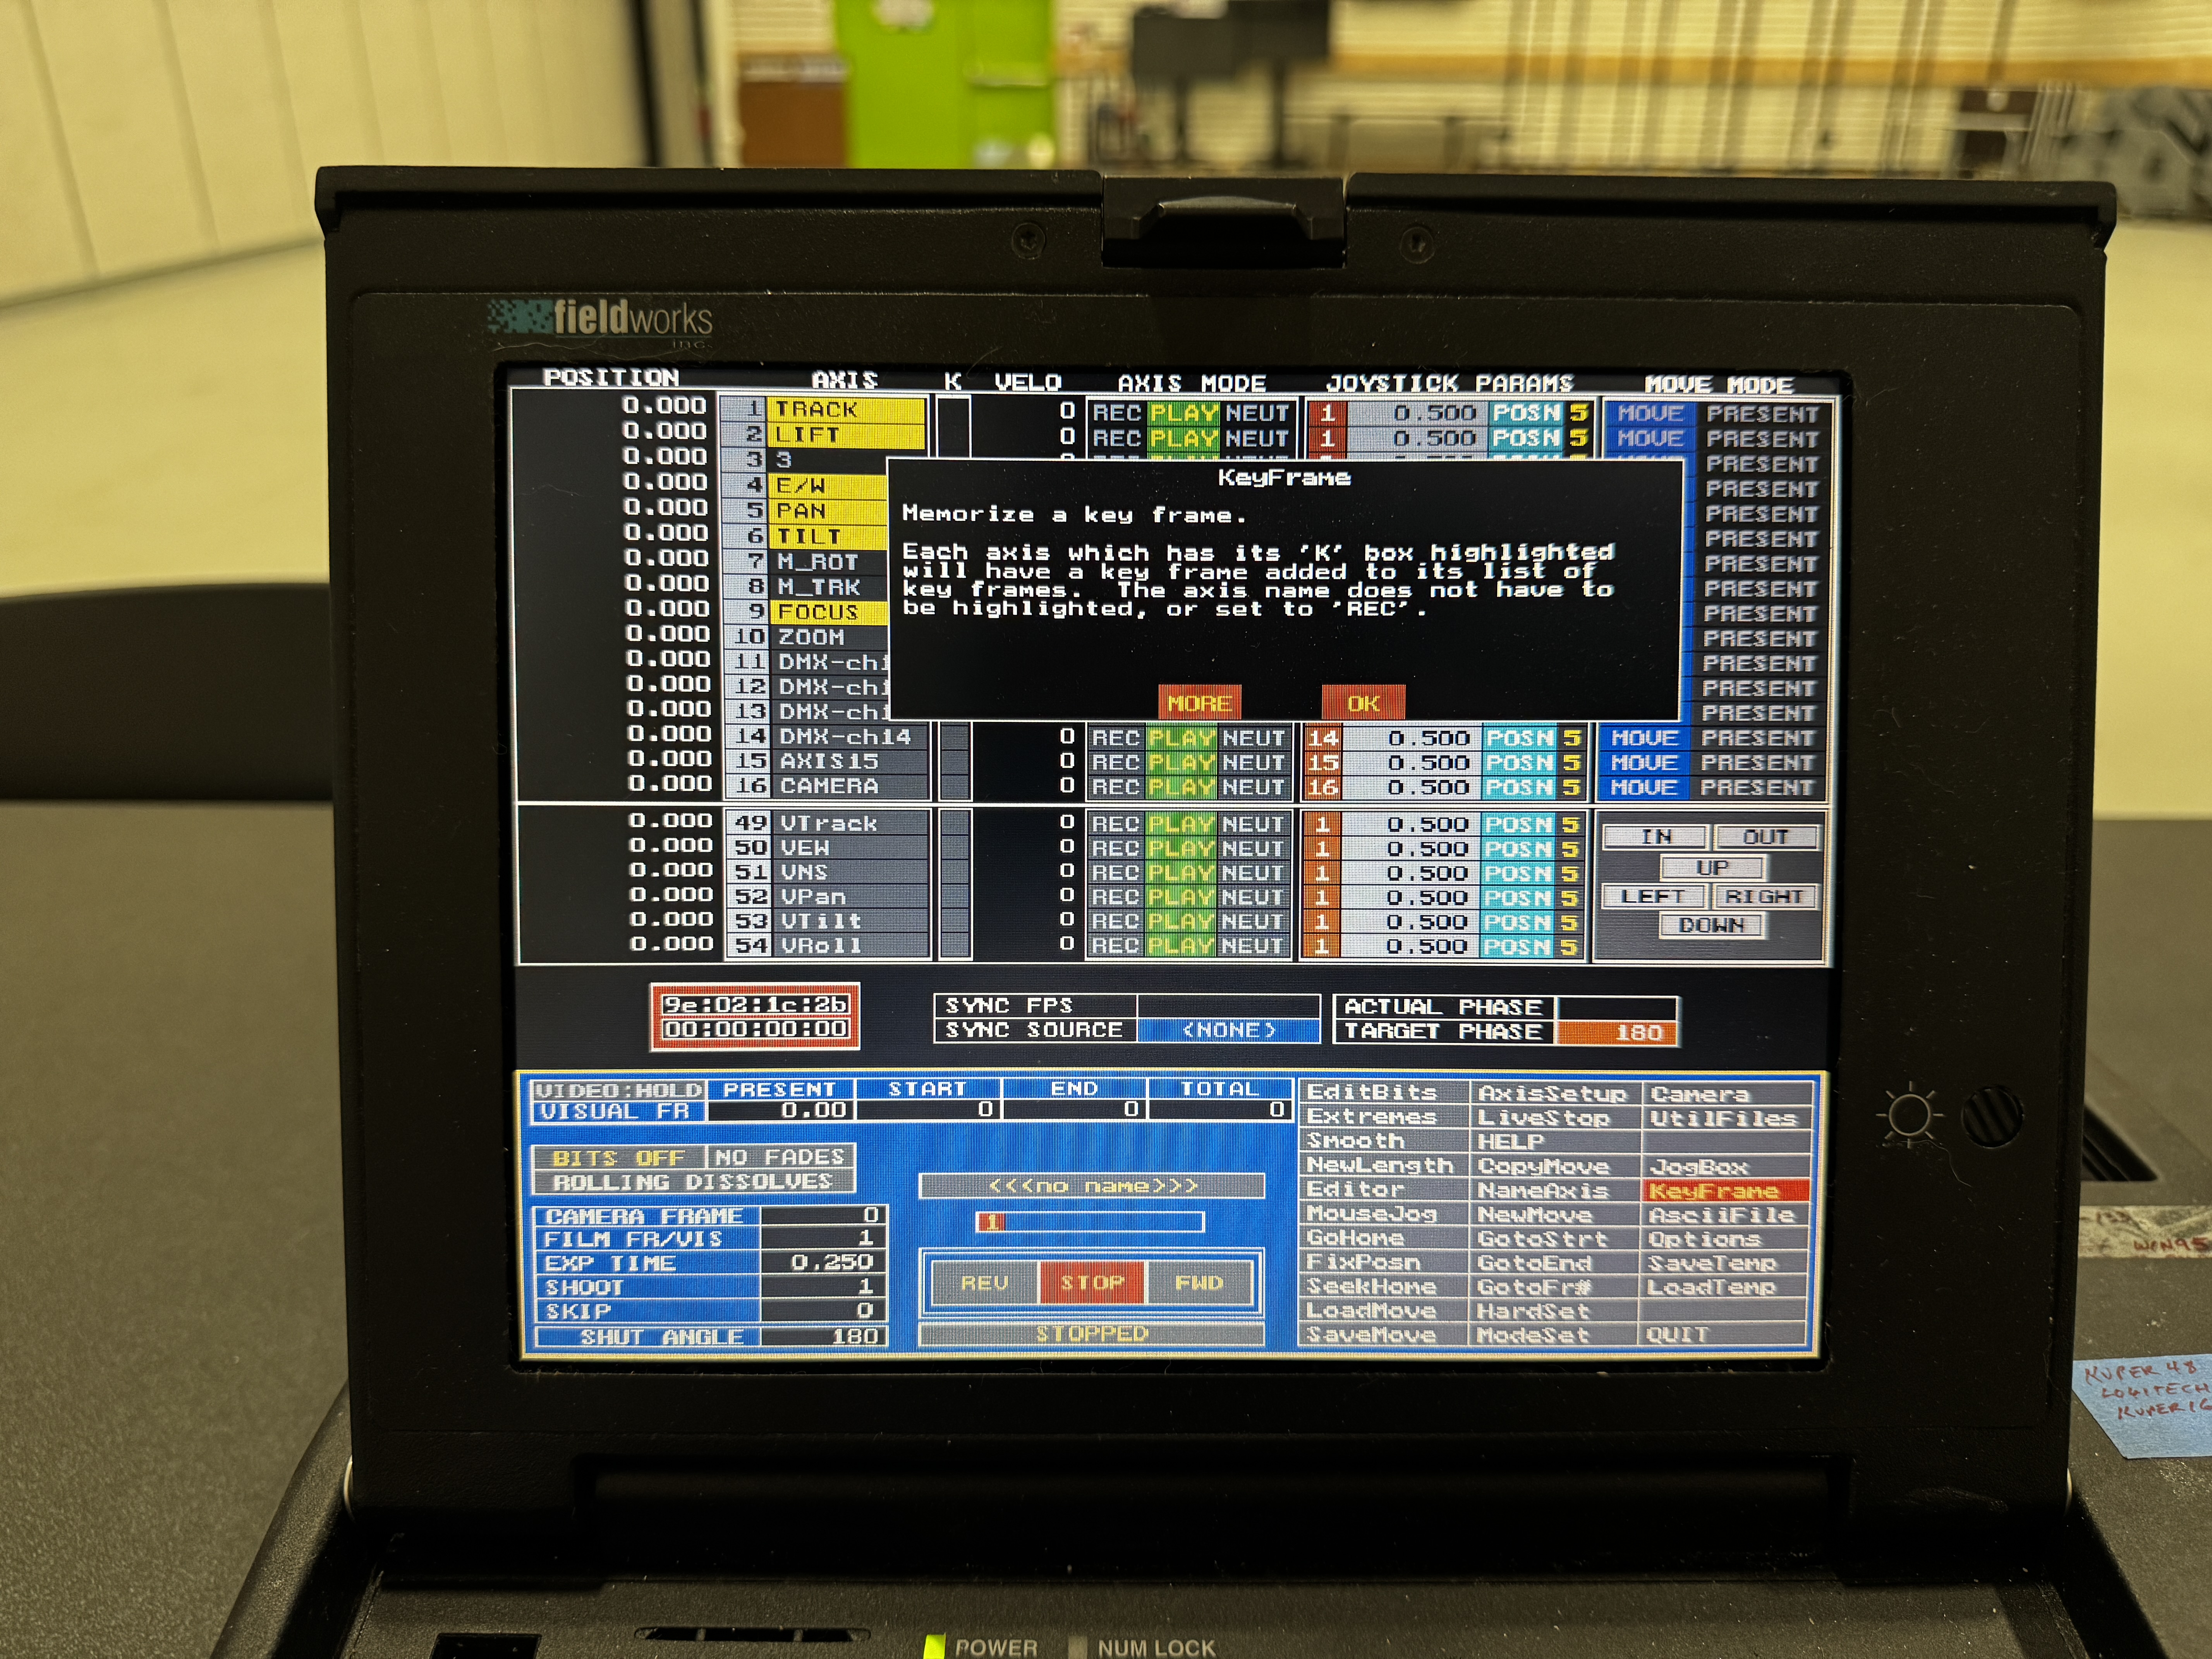
Keyframe Tips
- Spacing: Place keyframes at critical points in your movement (starts, stops, direction changes)
- Consistency: For smoother moves, try to place keyframes at regular intervals on the timeline
- Planning: Sketch your movement on paper to help visualize keyframe placement
- Start Simple: Begin with just 2-3 keyframes and add more only as needed for refinement
- Test Frequently: Run your move after adding each new keyframe to ensure it's developing as expected
Modifying Existing Keyframes
To change a keyframe you've already set:
- Navigate to the frame where the keyframe exists
- Jog axes to their new desired positions
- Press
MEMO KEYagain to overwrite the existing keyframe
Important: Always ensure you're at the correct frame before setting or modifying a keyframe. Adding a keyframe at the wrong frame can disrupt your carefully planned movement.
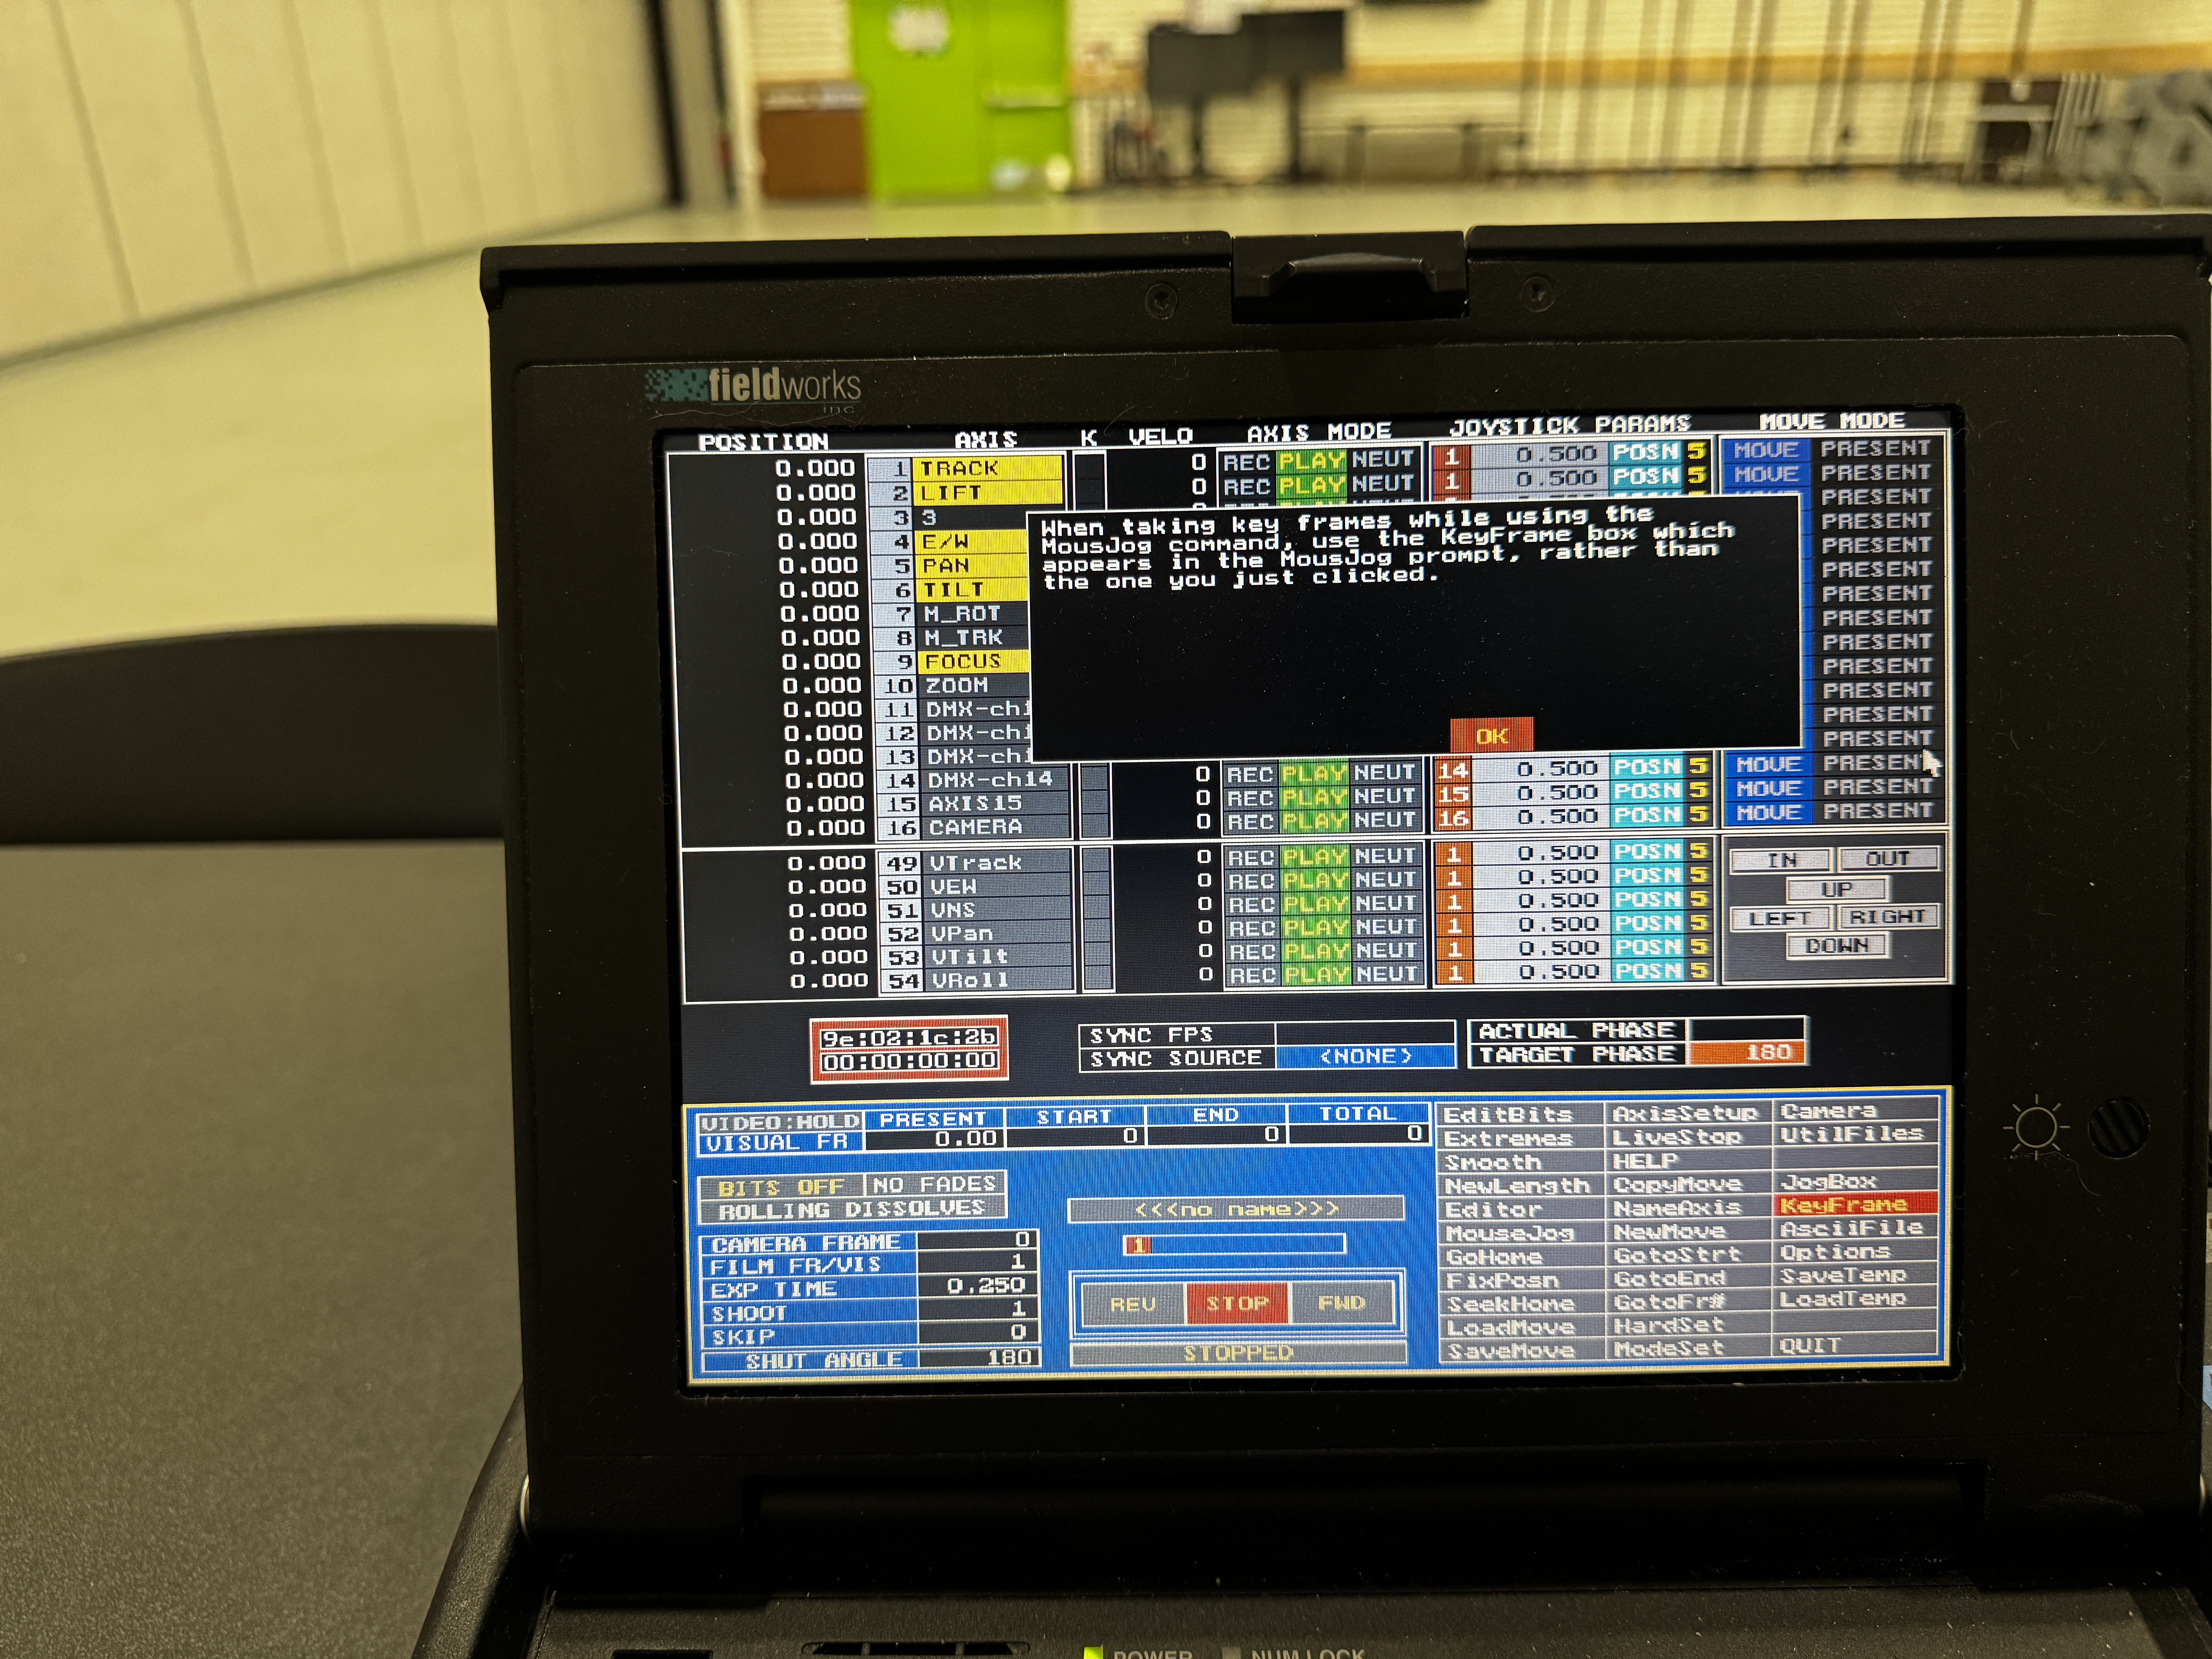
Recording Real-Time Movements
Joystick recording allows you to create more organic, natural-feeling movements by recording your manual control in real time.
Joystick Setup
Before recording, you need to configure which axes are controlled by the jogbox knob or external encoders:
- Press
JOYST AXon the jogbox - Press the number of the axis you want to control (e.g.,
5for Pan) - The jogbox display will confirm the assignment
- Rotate the knob to verify it controls the selected axis
Position vs. Velocity Mode
The jogbox can control axes in two different ways:
- Position Mode: The knob's position directly controls the axis position (more intuitive for beginners)
- Velocity Mode: The knob's position controls the speed of movement (better for smooth acceleration)
To toggle between modes:
- Press
POSN/VELOon the jogbox - The jogbox display will show the current mode
Tip: For smoother joystick recording, velocity mode is often preferred as it allows for more gradual acceleration and deceleration.
Recording a Joystick Move
- Prepare for Recording:
- Set all axes you want to record to
RECmode - Assign the jogbox or external encoders to the axes you want to control
- Go to Frame 0 by pressing
GOTO FR0 - Set the move duration (how many frames you'll record) by typing
mland entering a value
- Set all axes you want to record to
- Start Recording:
- Type
rm(Record Move) and pressEnter - The system will display "PRESS RUN TO START RECORDING"
- Press
RUNto begin recording
- Type
- Perform the Movement:
- Use the jogbox knob or external controllers to create your movement
- The system records in real-time as the frame counter advances
- The recording will stop automatically when the end frame is reached
- Alternatively, press
STOP/CANCELto end recording early
- Review and Refine:
- Go back to Frame 0 and press
RUNto play back your recorded move - If needed, you can re-record or use the Editor to refine the movement
- Go back to Frame 0 and press
Cleaning Up Joystick Recordings
Joystick recordings often capture small hand tremors or imperfections. To clean them up:
- Use the
ps(Pull Set) command:- Type
psat the main Control Panel - Enter the desired keyframe spacing (e.g., 10 frames)
- The system converts your continuous recording into evenly spaced keyframes
- Type
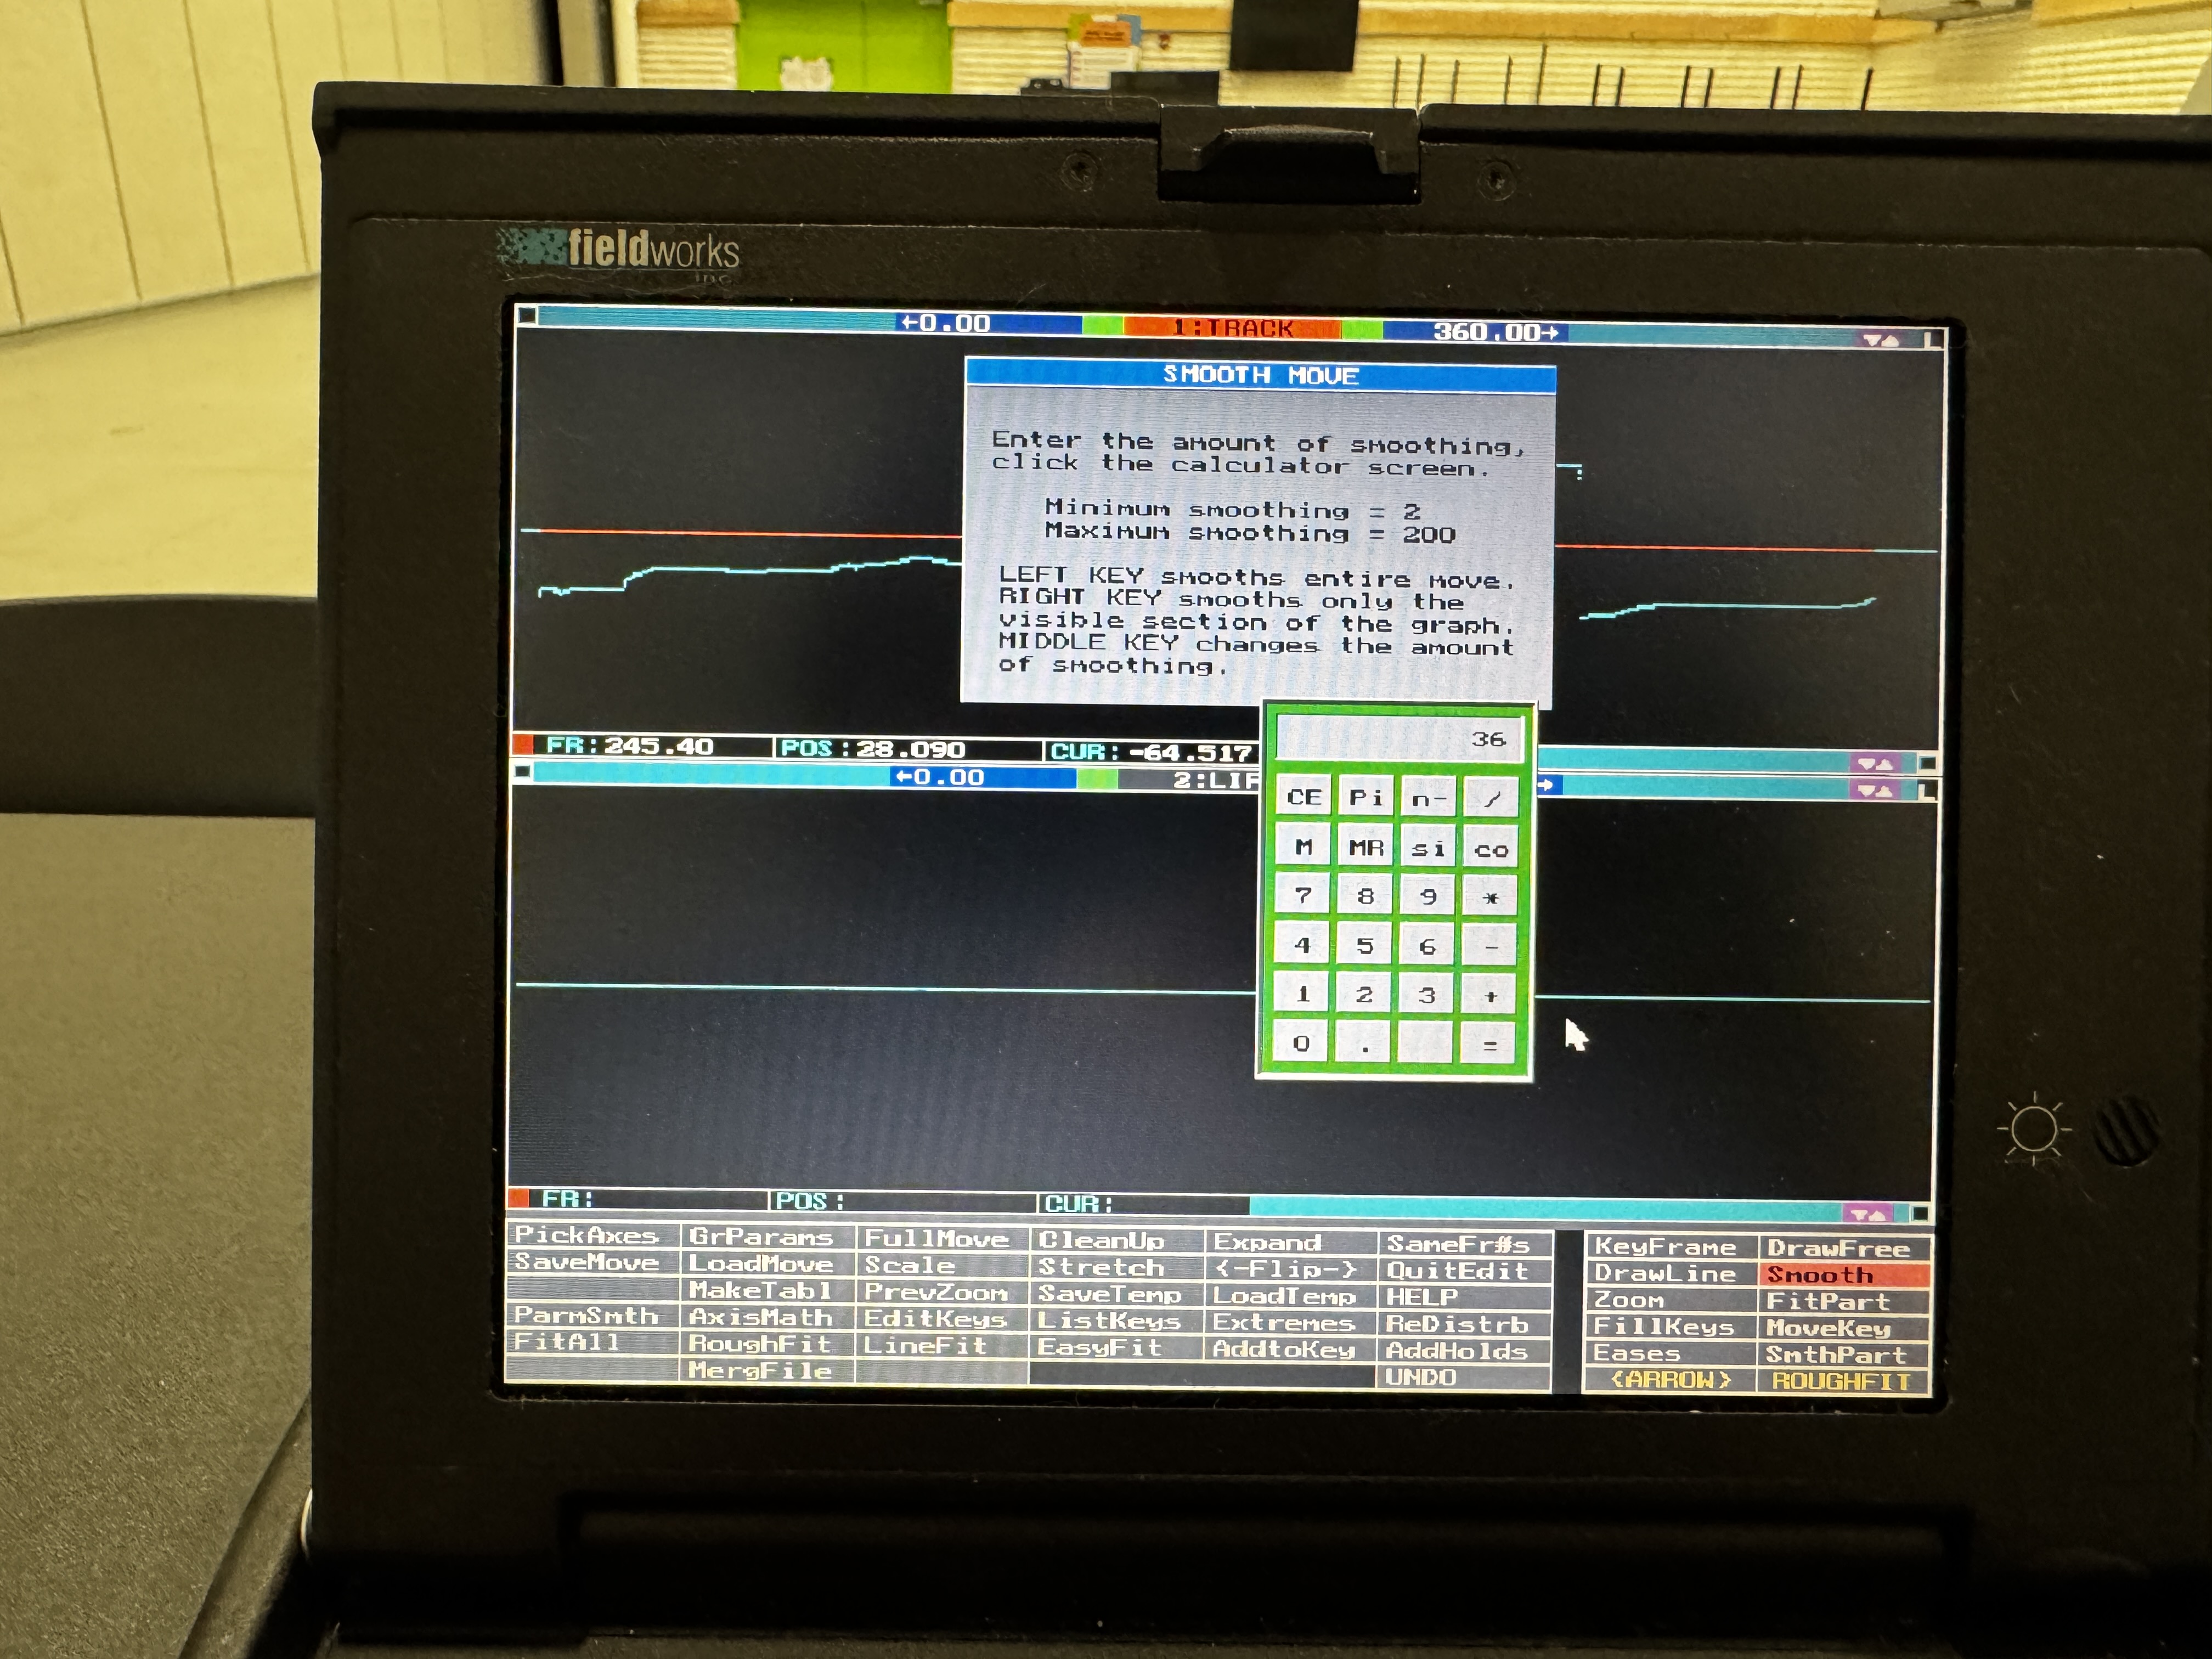
- Use the
sm(Smooth Move) command:- Type
smat the main Control Panel - Enter smoothing parameters as prompted
- The system applies a smoothing algorithm to your move
- Type
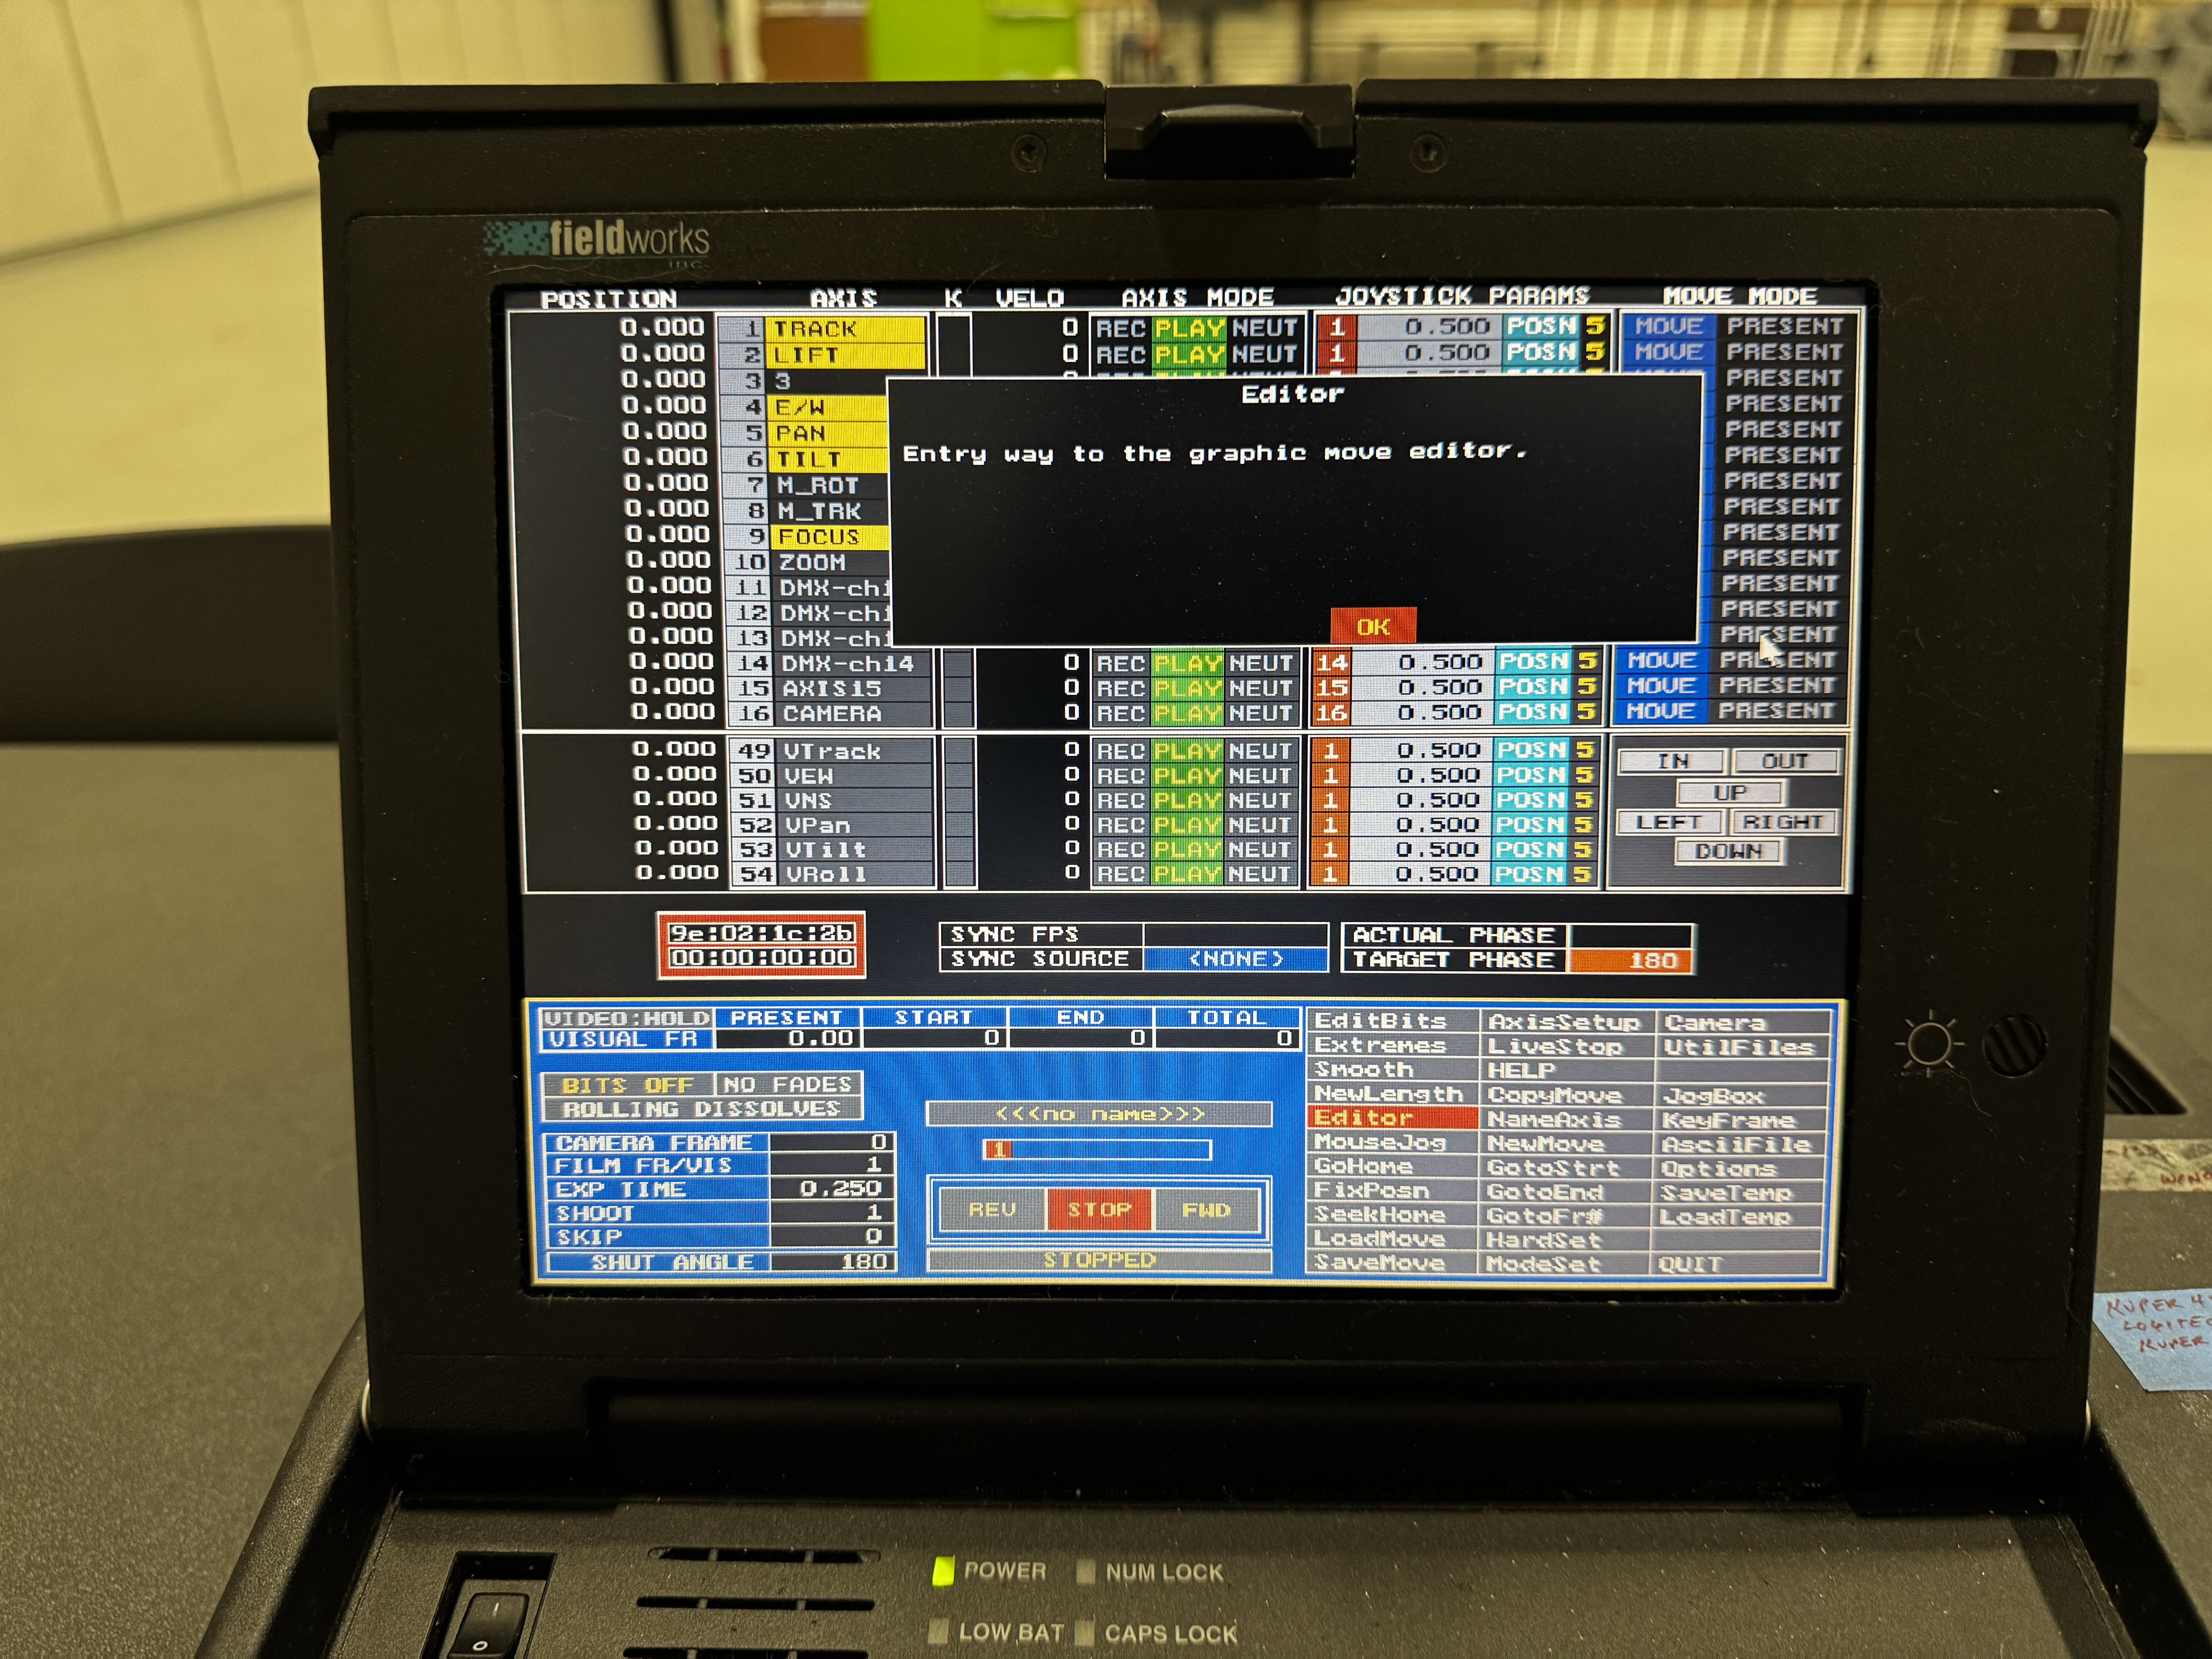
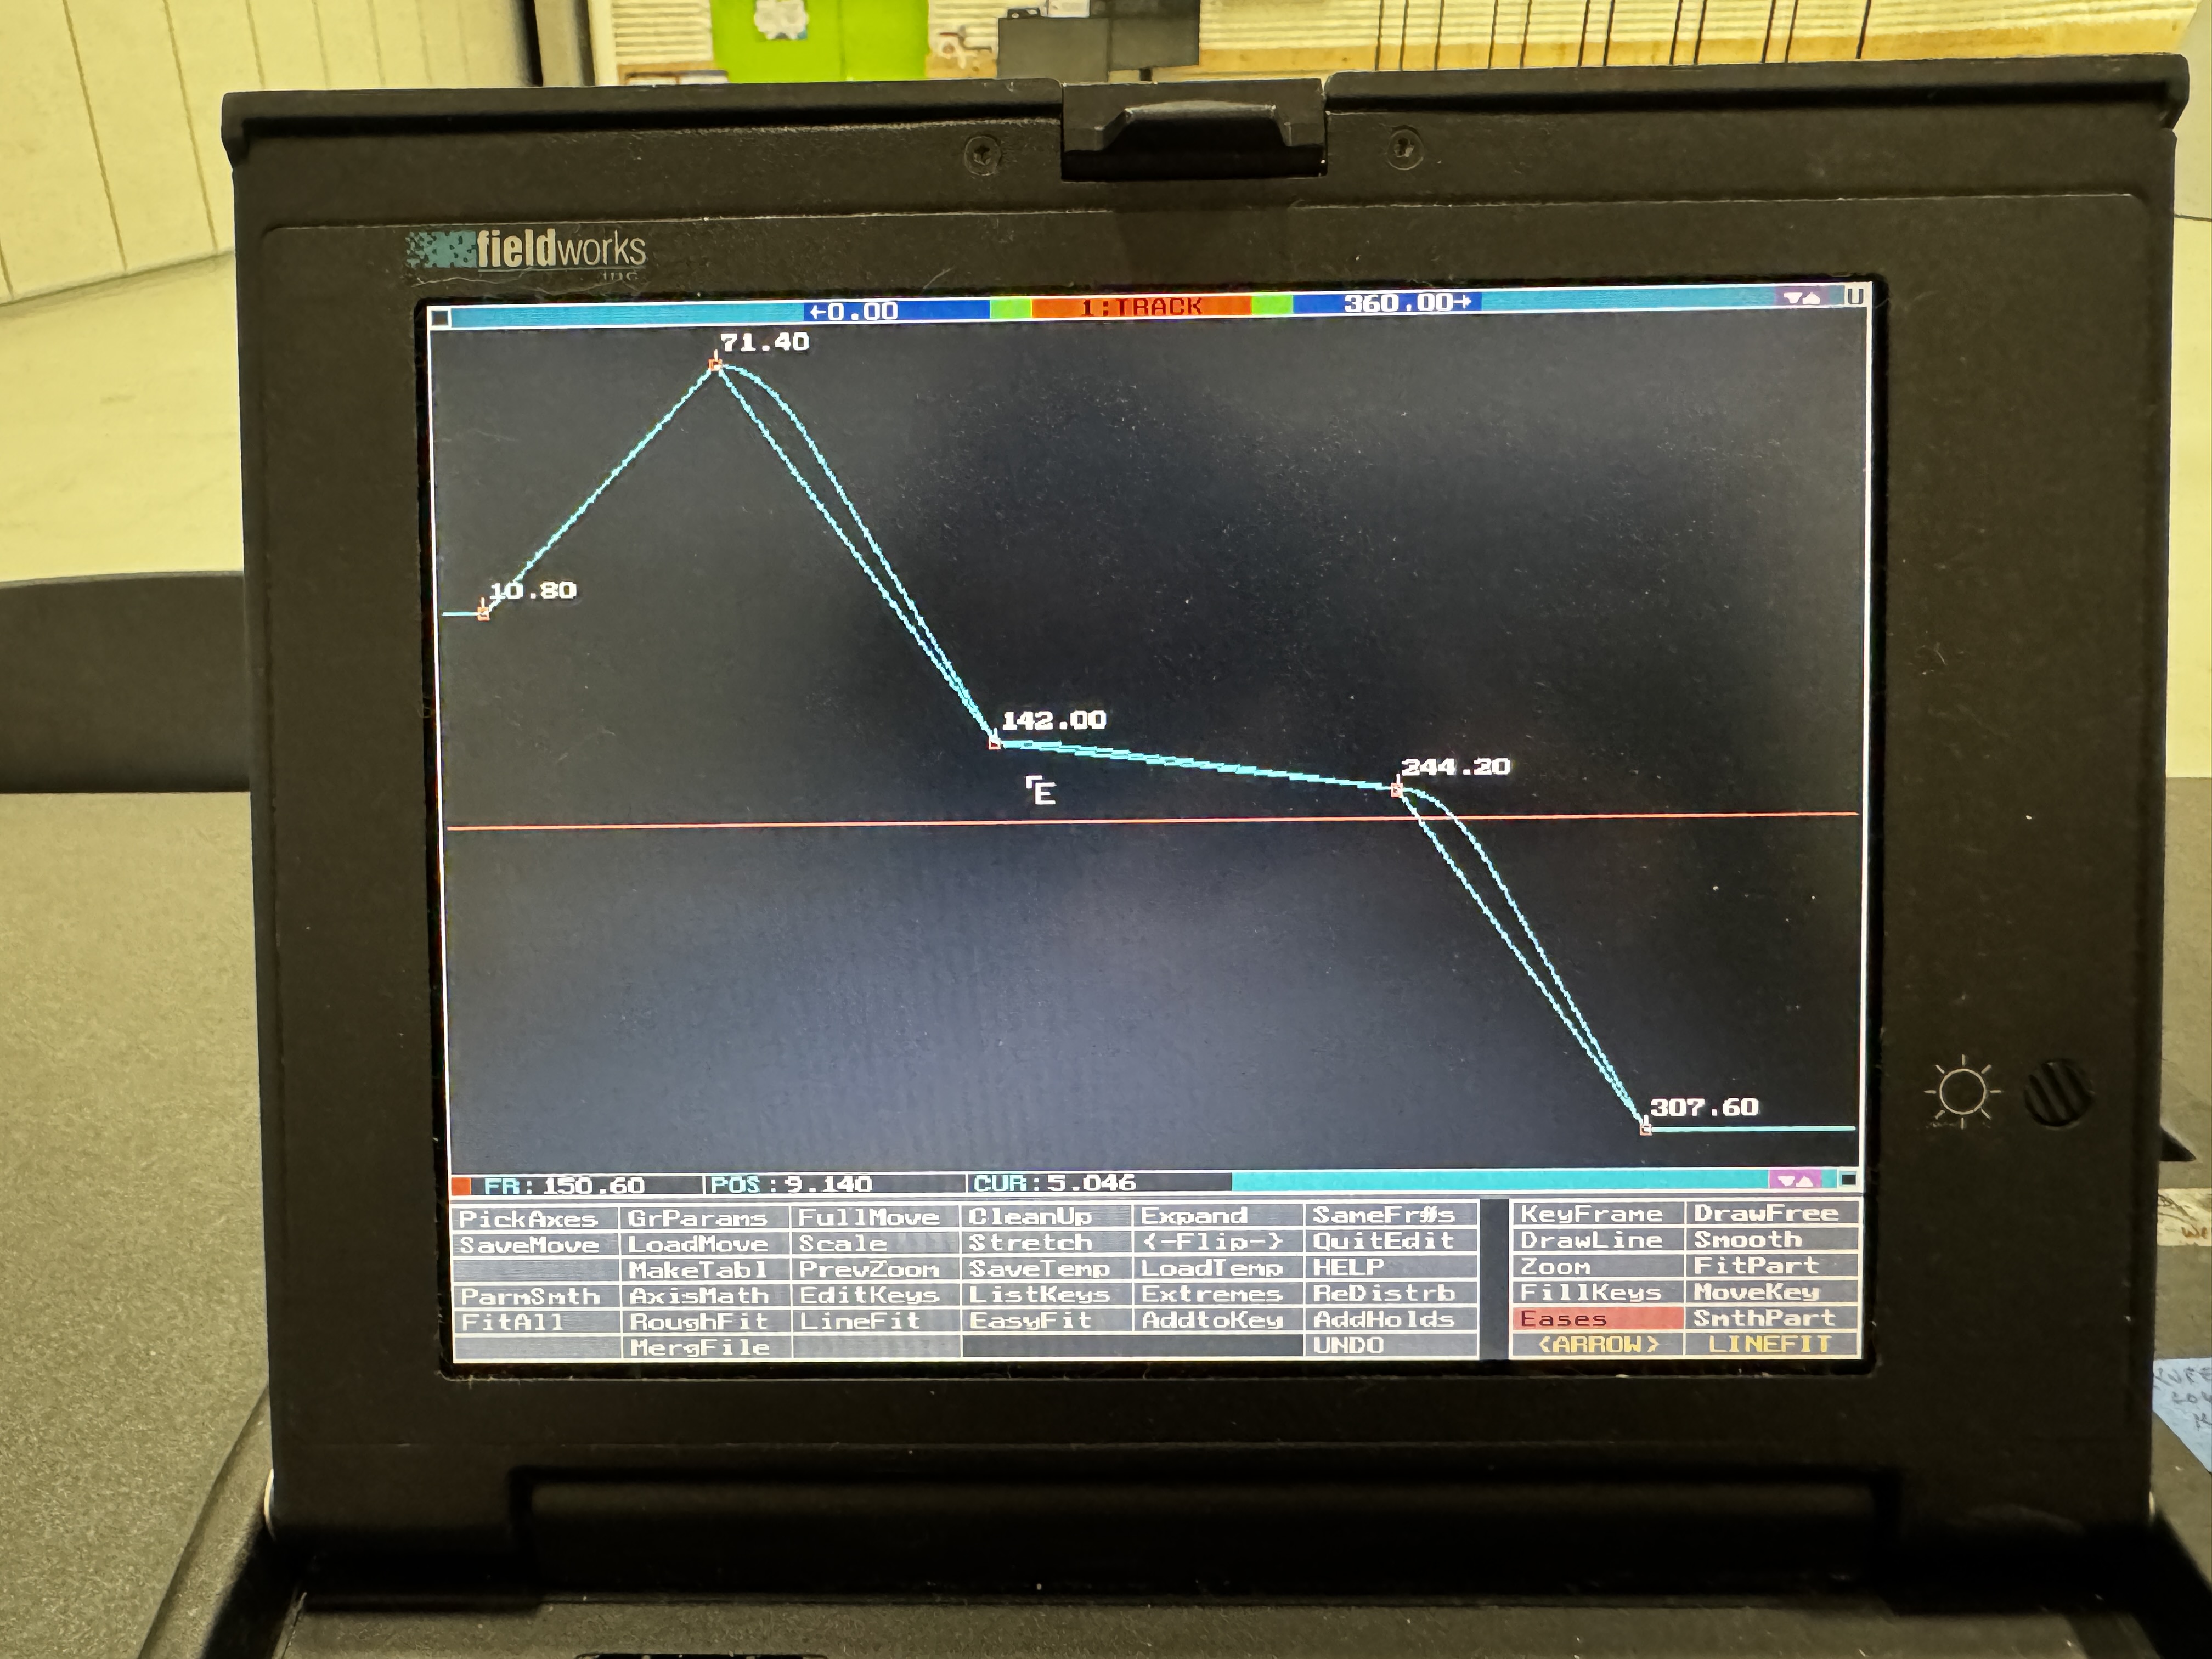
Using the Graph Editor
The Graph Editor provides a visual way to create and refine movements by manipulating motion curves directly.
Accessing the Editor
- Click
Editoron the main Control Panel - Or type
edand pressEnter - The Graph Editor screen will appear
Editor Interface Overview
The Graph Editor displays your movement as curves on a graph:
- X-Axis: Timeline in frames
- Y-Axis: Position values
- Points: Individual keyframes
- Lines/Curves: Interpolated movement between keyframes
Selecting and Editing Axes
- Press the number key corresponding to the axis you want to edit (1-9)
- That axis's curve will be displayed prominently
- You can view multiple axes simultaneously by selecting them in sequence
Editing Operations
The Editor offers several ways to modify your movement:
| Operation | Method | Effect |
|---|---|---|
| Add Keyframe | Click at desired position on graph | Creates a new keyframe at that frame/position |
| Move Keyframe | Click and drag existing keyframe | Changes the timing and/or position of the keyframe |
| Delete Keyframe | Select keyframe, press Delete |
Removes the keyframe, system recalculates curve |
| Adjust Curve | Manipulate tangent handles at keyframes | Changes acceleration/deceleration between keyframes |
| Change Curve Type | Select keyframe(s), use curve type menu | Applies different interpolation methods (Linear, Spline, etc.) |
Curve Types
The Editor supports various interpolation methods between keyframes:
- Linear: Straight lines between keyframes (mechanical feel)
- Spline: Smooth curves with automatic tangent calculation (natural feel)
- Ease In: Gradual acceleration from a stop
- Ease Out: Gradual deceleration to a stop
- Ease In/Out: Combination of ease in and ease out
- Constant: No movement between keyframes (stepped movement)
Tip: To achieve natural-looking camera movements, use Spline curves with slight Ease In/Out at the beginning and end of the move.
Advanced Movement Techniques
Once you've mastered the basics, these advanced techniques can help you create more sophisticated movements.
Two-Letter Commands
The RTMC130 system offers powerful two-letter commands for specialized movement creation:
| Command | Function | Usage |
|---|---|---|
em |
Exponent Moves | Creates exponential acceleration/deceleration curves |
ie |
Impose Eases | Adds ease-in/out effects to existing moves |
ps |
Pull Set | Converts continuous recording to evenly spaced keyframes |
sm |
Smooth Move | Applies smoothing algorithm to reduce jitter |
el |
Extend Linear | Extends move with constant velocity |
ec |
Extend Curve | Extends move with current acceleration/deceleration |
To use these commands:
- Type the two-letter code at the main Control Panel
- Press
Enter - Follow the on-screen prompts for parameters
- Press
Enteragain to execute
Multi-Pass Recording
For complex shots, you can build movements in layers:
- First Pass:
- Set only certain axes to REC mode (e.g., Pan/Tilt)
- Record or keyframe the movement for these axes
- Subsequent Passes:
- Set the previously recorded axes to NEUT
- Set different axes to REC mode (e.g., Track/Lift)
- Run the first recorded move while recording the new axes
- This allows you to precisely coordinate multiple axes
Creating Complex Move Patterns
Perfect Circle (Orbital Move):
- Set up an axis for horizontal movement (Track) and one for depth (East/West)
- Use the
cc(Create Circle) command - Enter the center position, radius, and duration
- The system will generate a perfect circular path
Figure-8 Pattern:
- Create a move with two axes
- For one axis (e.g., Pan), create a sine wave using
swcommand - For the other axis (e.g., Tilt), create a cosine wave that's twice as fast
- The combined movement will trace a figure-8 pattern
Important: Always test complex moves at low speeds first to ensure they behave as expected and won't cause equipment collisions.
Saving Your Work
As you create increasingly complex movements, it's crucial to save your work regularly:
- Use
UtilFiles → Save Moveto save your current movement - Give each movement a descriptive name
- For details on saving and loading, see the Saving & Loading section