Saving & Loading
How to store and retrieve your movements and system configurations in the RTMC130 Motion Control System.
Saving and Loading Files
The RTMC130 system uses various file types to store your movements, configuration settings, and other important data. Proper file management is crucial for maintaining your work and ensuring consistent operation across sessions.
Remember: The RTMC130 operates in an MS-DOS environment with file naming constraints. Filenames are limited to 8 characters with a 3-character extension (8.3 format). Save your work frequently to prevent loss due to system crashes or power failures.
Understanding File Types
The RTMC130 system uses several distinct file types, each serving a specific purpose:
| File Type | Extension | Contains | When to Use |
|---|---|---|---|
| Move Files | .MOV | Movement data, keyframes, and paths | To save a specific movement sequence |
| Setup Files | .SET | System configuration, axis settings, motor patches | To save hardware configuration settings |
| Environment Files | .ENV | Overall system preferences | To save global system settings |
| Temporary Files | .TMP | Temporary move storage | For quick save/restore operations |
| ASCII Files | .ASC | Text-based move data | For importing/exporting to other systems |
Default System Files
The RTMC130 system automatically looks for these important default files:
- DEFAULT.SET - Loaded automatically at startup if present
- RTMC.ENV - Contains environment variables and global settings
- LASTMOVE.MOV - Auto-saved version of the most recent move (for recovery)
Tip: After configuring your system to your preferences, always save a DEFAULT.SET file. This will ensure the system returns to your preferred configuration each time you start the software.
Saving Movements
After creating a movement sequence, saving it is essential to preserve your work for future use.
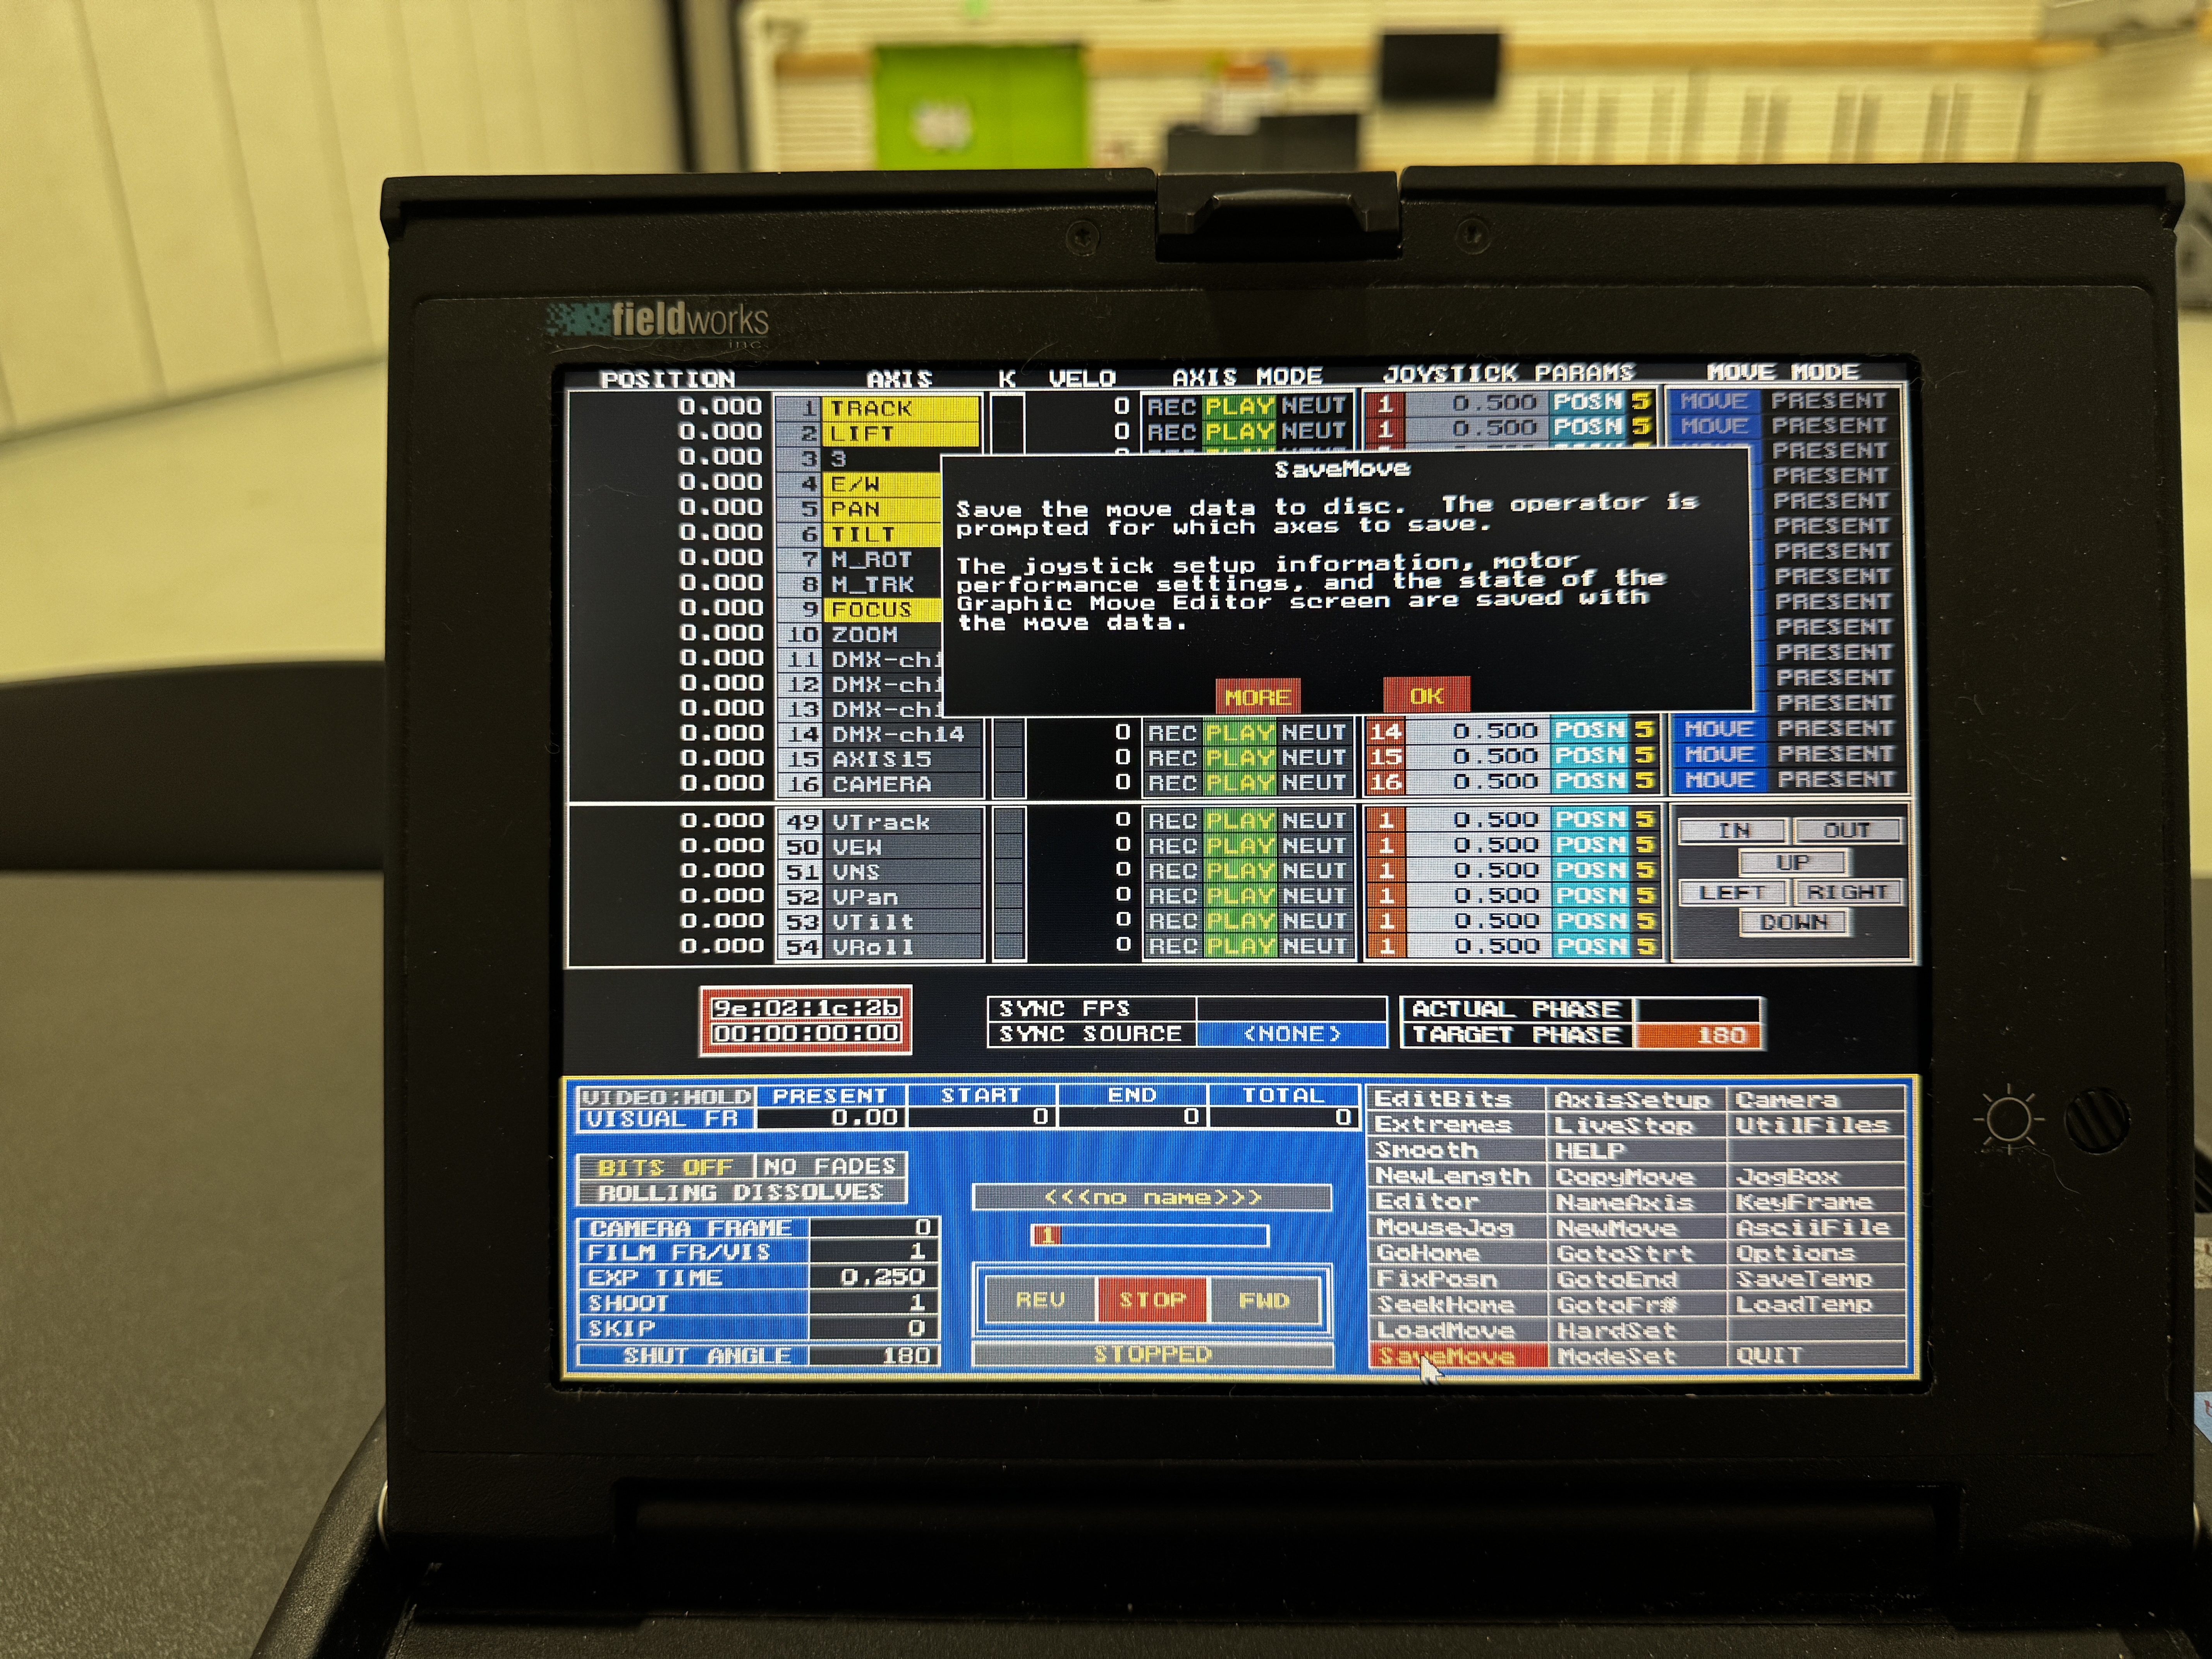
Saving a Move File
- From the main Control Panel, click
UtilFiles - Select
Save Movefrom the menu - The Save Move dialog will appear
- Enter a filename (up to 8 characters, no extension needed)
- Optionally, add a description of the move when prompted
- Press
Enterto save - The system will save the file with a .MOV extension
Quick Temporary Save
For quick saves during work sessions:
- From the main Control Panel, click
UtilFiles - Select
Save Tempfrom the menu - The move will be saved with an automatically assigned temporary name
Keyboard Shortcut: Type st (Save Temp) followed by Enter at the main Control Panel for a quick temporary save.
Naming Conventions
Due to the 8-character limit, develop a consistent naming scheme:
- Project Prefixes: Use 2-3 letter prefixes for projects (e.g.,
CM_for "Commercial") - Version Numbers: Include version numbers (e.g.,
ORBIT_01,ORBIT_02) - Move Types: Indicate move type (e.g.,
PAN_ORBTfor a panning orbit) - Descriptive: Make names descriptive within the constraints (e.g.,
DOLLY_IN)
Important: The system will overwrite existing files with the same name without warning. Always use unique filenames or verify before saving with an existing name.
Loading Movements
Loading previously saved movements allows you to reuse your work or continue editing from a previous session.
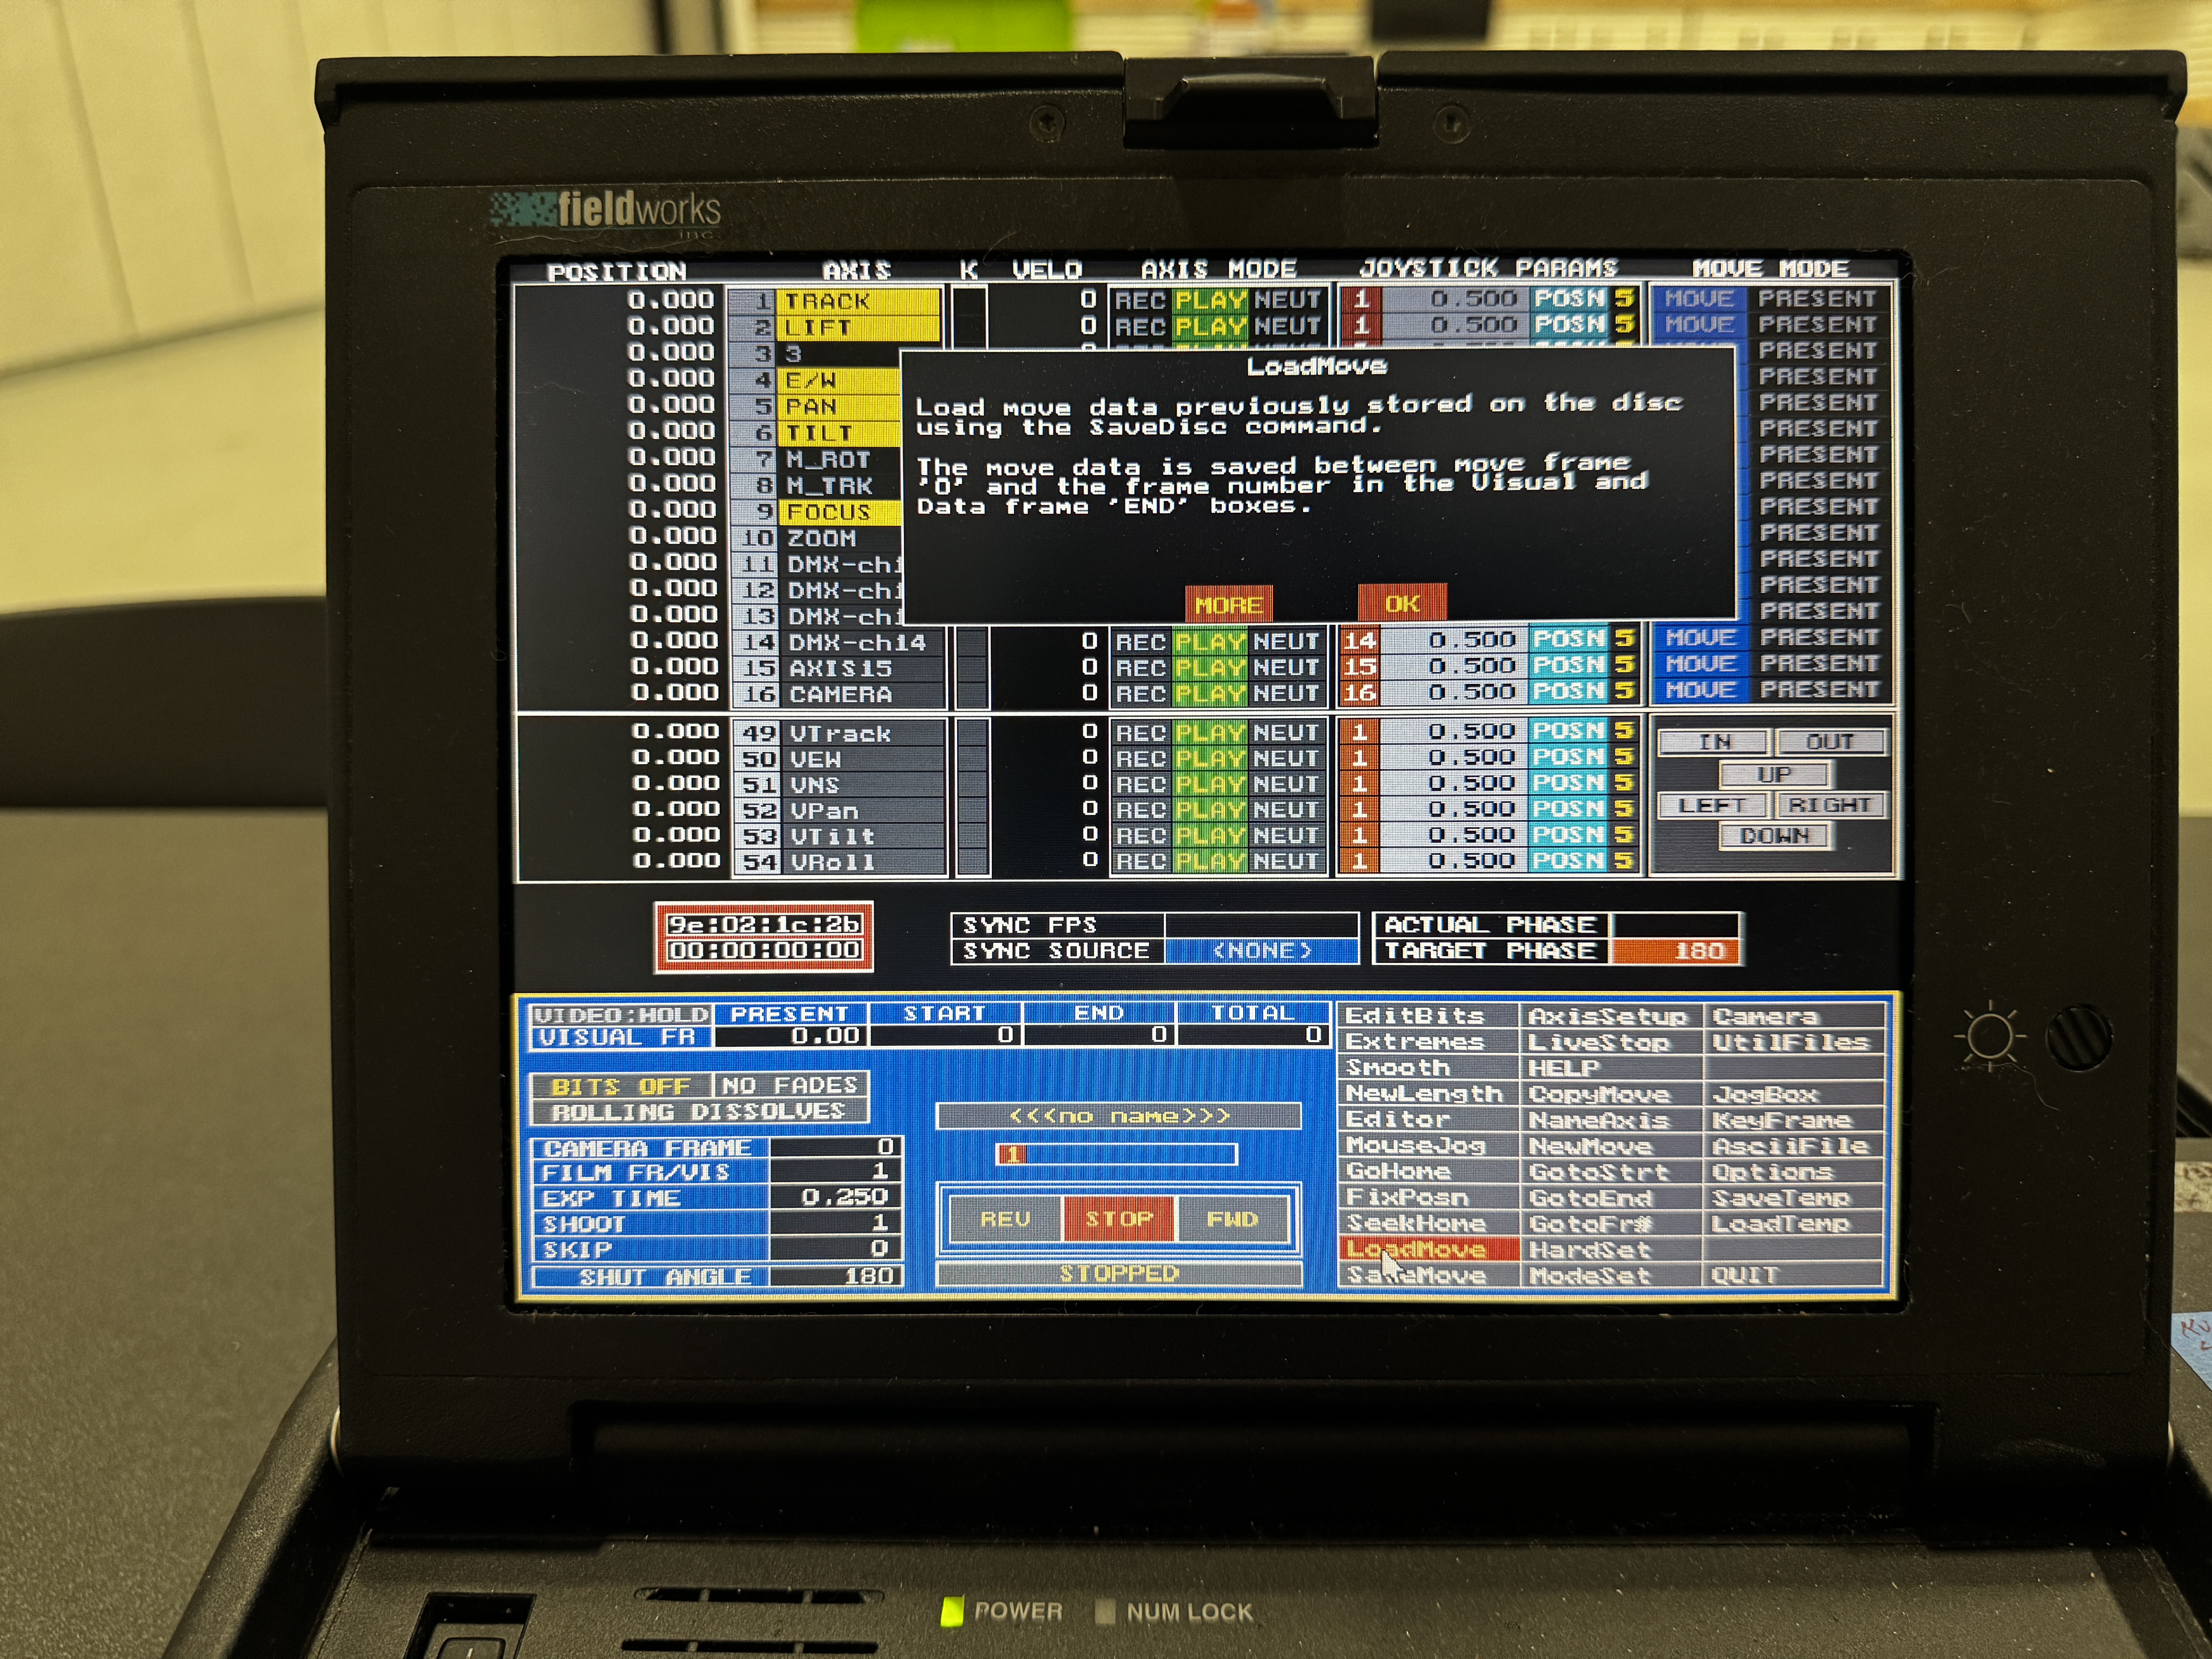
Loading a Move File
- From the main Control Panel, click
UtilFiles - Select
Load Movefrom the menu - The Load Move dialog will appear showing available move files
- Use the arrow keys to navigate through the file list
- Press
Enterto select the highlighted move - The move will be loaded into memory, replacing any current move data
Restoring a Temporary Save
- From the main Control Panel, click
UtilFiles - Select
Load Tempfrom the menu - The system will display available temporary saves
- Select the desired temporary file to load
Keyboard Shortcut: Type lt (Load Temp) followed by Enter at the main Control Panel to quickly load the most recent temporary save.
Before Loading a Move
Take these precautions before loading a move file:
- Save Current Work: If you have unsaved changes, save them first
- Check Configuration: Ensure your hardware configuration matches the one used when the move was created
- Verify Space: Make sure the physical space is clear for the movement that will be loaded
- Initial Test: After loading, run the move at low speed first to verify it behaves as expected
Safety Warning: Loading a move and immediately running it at full speed can be dangerous if the move requires more physical space than is available or uses different axis assignments than your current setup.
Saving System Configurations
Setup files store your hardware configuration, including motor patches, axis settings, and calibration values. Saving these settings is crucial for maintaining consistent system behavior.
Saving a Setup File
- Configure your system as desired:
- Set axis parameters in AxisSetup
- Configure motor patching (see Motor Patching)
- Adjust any other hardware settings
- From the main Control Panel, click
UtilFiles - Select
Save Setupfrom the menu - Enter a filename (up to 8 characters)
- Press
Enterto save - The system will save the file with a .SET extension
Saving the Default Setup
To create a configuration that loads automatically at startup:
- Configure your system as desired
- From the main Control Panel, click
UtilFiles - Select
Save Default Setupfrom the menu - The system will save the configuration as
DEFAULT.SET
Multiple Machine Configurations: If you use your system with different physical configurations, create separate setup files for each (e.g., CRANE.SET, DOLLY.SET).
Loading a Setup File
- From the main Control Panel, click
UtilFiles - Select
Load Setupfrom the menu - The Load Setup dialog will appear showing available setup files
- Select the desired setup file
- Press
Enterto load - The system will apply the configuration immediately
Important: Loading a setup file changes your axis calibrations and motor patching immediately. This can cause unexpected movement if motors are powered. Consider disabling motor drivers before loading a new setup.
File Management
Proper file management is essential for maintaining an organized workflow and preventing data loss.
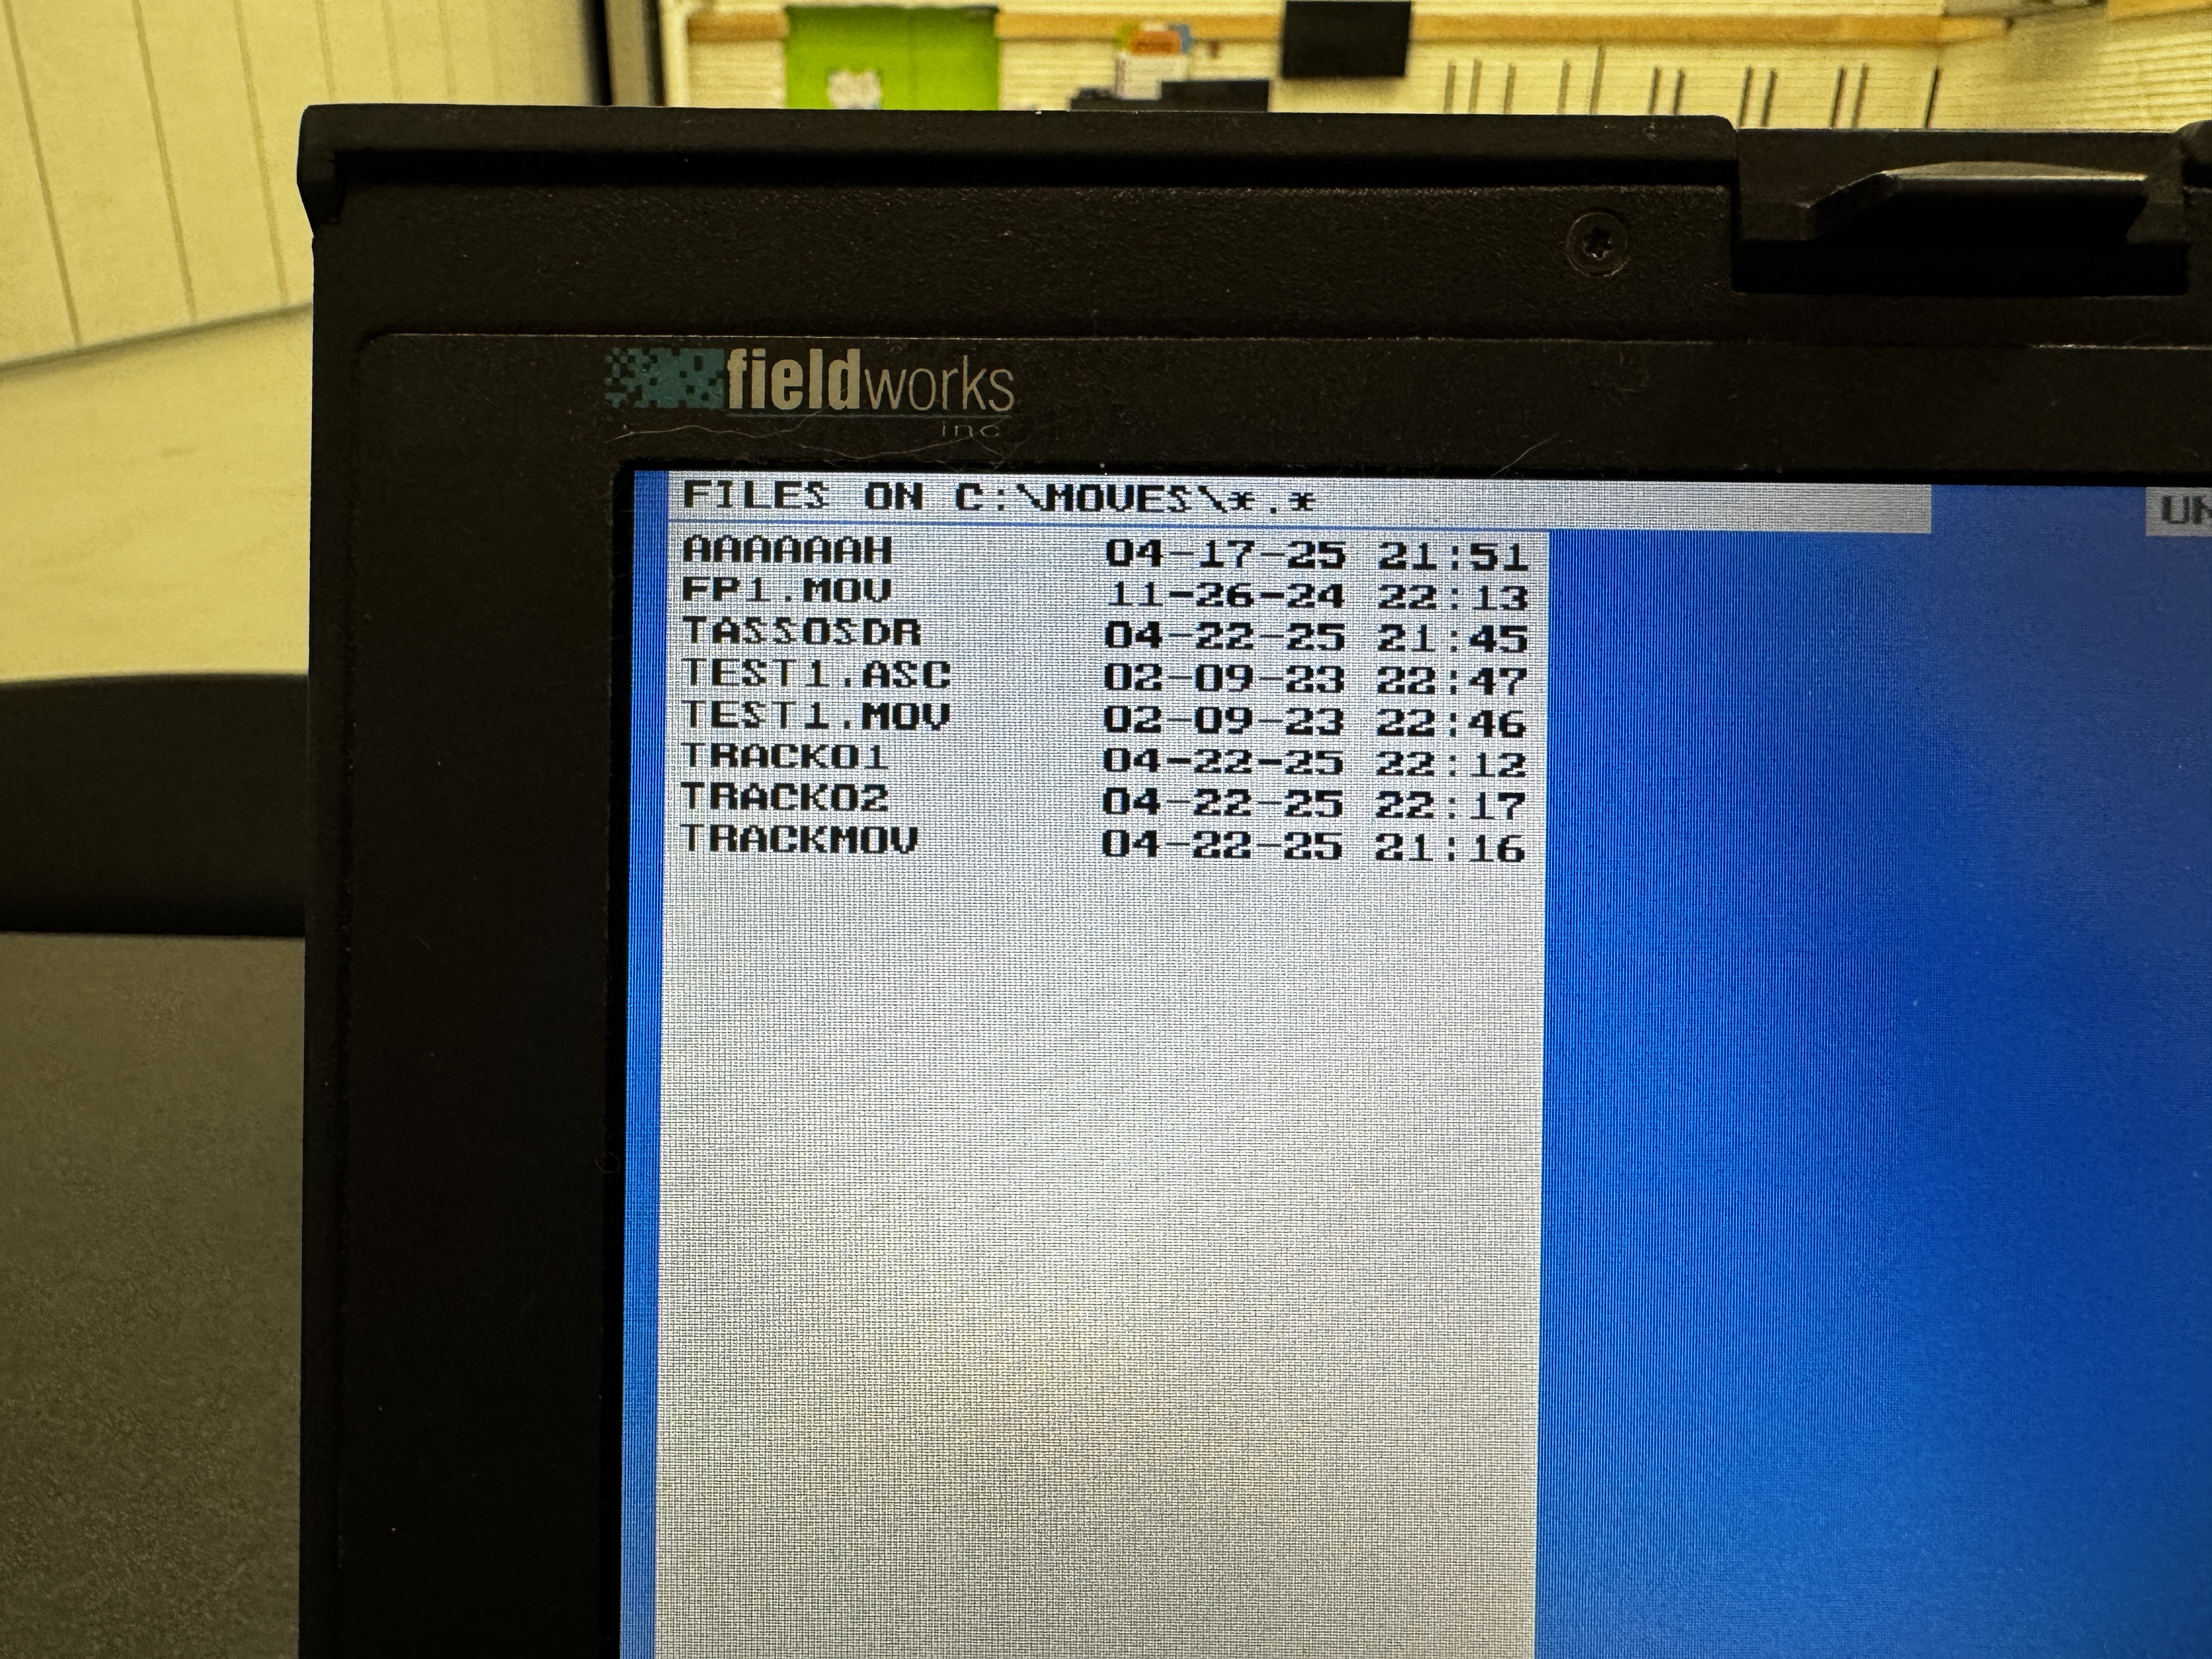
Viewing File Directories
- From the main Control Panel, click
UtilFiles - Select
View Movesto see all move files orView Setupsto see setup files - Use arrow keys to navigate through the list
- Press
ESCto return to the menu
Copying and Backing Up Files
Regular backups are crucial. To copy files to a backup disk:
- Exit the RTMC130 software to return to DOS
- Use DOS commands to copy files:
COPY *.MOV A:
COPY *.SET A:
- Or use a backup utility if available
File Management Best Practices
- Regular Backups: Back up important moves and setups to external media regularly
- Version Control: Use incrementing version numbers for iterative work
- Documentation: Keep a written log of important file details and settings
- Clean-up: Periodically remove obsolete files to prevent clutter
- Organization: Group related files using consistent naming conventions
Tip: At the end of each project, create an archive folder on a separate drive with all the related move and setup files. Label it clearly with the project name and date.
Recovering Lost Files
If you experience a crash or power failure:
- Upon restarting, use the
rq(Reload Quit) command at the main prompt - This will attempt to recover data from the last session
- If successful, immediately save the recovered data with a new name
Important: Recovery is not always possible after a crash. This reinforces the importance of frequent saving during your work sessions.